Central themes: Canvas instructions
The next couple of tutorials will move to a new application in order to showcase some more of Kivy’s core components. In this tutorial we’ll cover canvas instructions, Kivy’s low level drawing API which is always available. In the next two, we’ll add touch/mouse interaction to let you click to draw stuff, and then introduce kv language, and show how it interacts with Python code to easily produce guis without so much Python boilerplate.
To showcase Kivy’s drawing API, our next app will be a simple drawing application. We’ll be making a widget gui to select a few different options (colour, size etc.), and handling the mouse/touch interaction manually to draw the result of user input.
We’ll need to start with a new basic app template, as introduced in the first couple of tutorials:
from kivy.app import App


class DrawingApp(App):
    def build(self):
        return None

DrawingApp().run()
Before anything else, let’s start by getting some basic drawing working, with no other gui components. There isn’t a Widget for drawing already (there’s no nice way to abstract all the options you might want), so instead Kivy makes it easy to build your own Widget class:
from kivy.uix.widget import Width

class DrawingWidget(Widget):
    pass

class DrawingApp(App):
    def build(self):
        return DrawingWidget()

DrawingApp().run()
You can run the app now, but the screen will just be black because Widget (and therefore DrawingWidget) doesn’t draw anything by default. We’re using Widget as the base class because we want to add it to the screen, but don’t need any extra behaviour beyond that.
Time to do our own drawing. Change your code to add the following:
from kivy.app import App
from kivy.uix.boxlayout import BoxLayout
from kivy.uix.slider import Slider

from kivy.uix.widget import Widget
from kivy.graphics import Rectangle, Color

class DrawingWidget(Widget):
    def __init__(self):
        super(DrawingWidget, self).__init__()

        with self.canvas:
            Color(1, 0, 0, 1)  # the arguments are red, blue,
                               # green, alpha
            Rectangle(size=(300, 100),
                      pos=(300, 200))


class DrawingApp(App):

    def build(self):
        root_widget = DrawingWidget()
        return root_widget

DrawingApp().run()
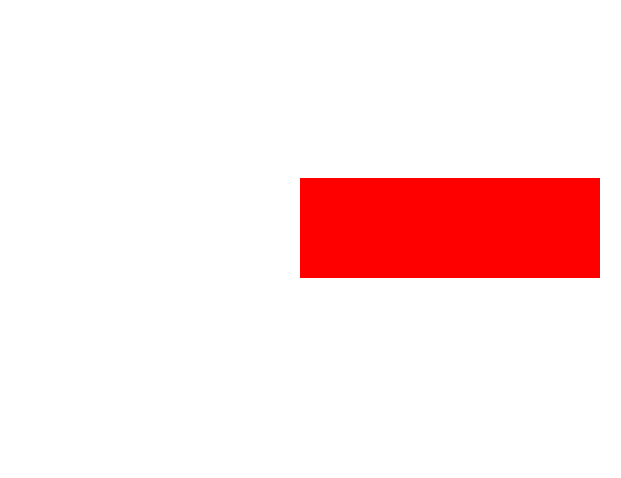
If you run the app now, you’ll see a red rectangle. Its position in pixels will be 300 right and 200 up from the bottom left of the screen; Kivy’s coordinate system follows OpenGL in having its coordinate origin there.

This is the basic way of doing any kind of drawing, and with a combination of canvas instructions (also called graphics instructions) you can achieve any kind of gui result. In fact, anything you see drawn with Kivy is ultimately using canvas instructions, including all the built in widget classes!
The basic procedure always follows this one. First, open a with self.canvas block - this sets an internal variable that means all graphics instructions are drawn to the canvas of the current widget. All widgets have a canvas, you can draw on e.g. a Label or BoxLayout if you want. Second, instantiate any graphics instructions; in this case we use Color (which sets the colour of any following instructions) and Rectangle (which draws a rectangle at the given position). Any instructions you add later will be drawn on top of the previous ones.
Try changing these arguments to modify what you see. The arguments to Color are red, green, blue and alpha components (currently opaque red). You can also try drawing other shapes by checking the vertex instruction documentation (vertex instructions are shapes, other instructions like Color are claled context instructions and include e.g. translation and rotation).
Note
As with several other things mentioned so far, canvas instructions have their own simple syntax for drawing in kv language, introduced in tutorial 7.
Note
You can also access self.canvas.before and self.canvas.after; everything in the former is drawn first, then everything in self.canvas, then everything in self.canvas.after. This helps you to draw in layers if necessary.
Let’s now draw a Rectangle filling the whole DrawingWidget, serving as the background of anything we draw:
from kivy.app import App
from kivy.uix.boxlayout import BoxLayout
from kivy.uix.slider import Slider

from kivy.uix.widget import Widget
from kivy.graphics import Rectangle, Color

class DrawingWidget(Widget):
    def __init__(self):
        super(DrawingWidget, self).__init__()

        with self.canvas:
            Color(1, 1, 1, 1)
            Rectangle(size=self.size,
                      pos=self.pos)


class DrawingApp(App):

    def build(self):
        root_widget = DrawingWidget()
        return root_widget

DrawingApp().run()
Surprise, it doesn’t work right! Although we set the rectangle size to self.size (the size of the DrawingWidget), and its pos to self.pos (the pos of the DrawingWidget), it always appears in the bottom left of the window and has size 100 pixels square. This is because although the DrawingWidget fills the window (because it is the root widget), its pos and size are not set until after its __init__ method has finished.
Note
pos and size are two more Kivy properties that all widgets have. They give the position of the bottom left corner (in pixels) and the size of the Widget (also in pixels).
To solve this problem, we again use event bindings:
class DrawingWidget(Widget):
    def __init__(self):
        super(DrawingWidget, self).__init__()

        with self.canvas:
            Color(1, 1, 1, 1)
            self.rect = Rectangle(size=self.size,
                                  pos=self.pos)
        self.bind(pos=self.update_rectangle,
                  size=self.update_rectangle)


    def update_rectangle(self, instance, value):
        self.rect.pos = self.pos
        self.rect.size = self.size
This works just like in the previous tutorials; we’ve bound to the pos and size of the widget, and made it so that whenever they update the Rectangle is also updated. Remember, this is possible because pos and size are Kivy properties, which you can also bind to (the function is called when their value changes). When run, your app should now look like the following:
This tutorial has introduced the basic use of canvas instructions, including the notion of automatically updating them in response to gui changes, thanks to event binding. This is an important building block for building complex applications.
In the next tutorial we’ll introduce mouse/touch input handling, so that we can finally draw something dynamicall in response to user input.
Full code
main.py:
from kivy.app import App
from kivy.uix.boxlayout import BoxLayout
from kivy.uix.slider import Slider

from kivy.uix.widget import Widget
from kivy.graphics import Rectangle, Color

class DrawingWidget(Widget):
    def __init__(self):
        super(DrawingWidget, self).__init__()

        with self.canvas:
            Color(1, 1, 1, 1)
            self.rect = Rectangle(size=self.size,
                                  pos=self.pos)
        self.bind(pos=self.update_rectangle,
                  size=self.update_rectangle)


    def update_rectangle(self, instance, value):
        self.rect.pos = self.pos
        self.rect.size = self.size


class DrawingApp(App):

    def build(self):
        root_widget = DrawingWidget()
        return root_widget

DrawingApp().run()