This is number 9 in a series of introductory Kivy tutorials.
Central themes: Passing data between widgets, creating Kivy properties
This tutorial directly follows on from the previous, so start by retrieving the previous code, as below:
main.py:
from kivy.app import App
from kivy.uix.boxlayout import BoxLayout
from kivy.uix.slider import Slider

from kivy.uix.boxlayout import BoxLayout
from kivy.uix.label import Label
from kivy.uix.slider import Slider

from kivy.uix.widget import Widget
from kivy.graphics import Rectangle, Color, Line

from random import random

class DrawingWidget(Widget):
    def on_touch_down(self, touch):
        super(DrawingWidget, self).on_touch_down(touch)

        if not self.collide_point(*touch.pos):
            return

        with self.canvas:
            Color(random(), random(), random())
            self.line = Line(points=[touch.pos[0], touch.pos[1]], width=2)

    def on_touch_move(self, touch):
        if not self.collide_point(*touch.pos):
            return

        self.line.points = self.line.points + [touch.pos[0], touch.pos[1]]


class Interface(BoxLayout):
    pass

class DrawingApp(App):

    def build(self):
        root_widget = Interface()
        return root_widget

DrawingApp().run()
drawing.kv:
<DrawingWidget>:
    canvas:
        Color:
            rgba: 1, 1, 1, 1
        Rectangle:
            pos: self.pos
            size: self.size

<ColourSlider@Slider>:
    min: 0
    max: 1
    value: 0.5
    size_hint_y: None
    height: 50


<Interface>:
    orientation: 'vertical'
    DrawingWidget:
    ColourSlider:
        id: red_slider
    ColourSlider:
        id: green_slider
    ColourSlider:
        id: blue_slider
    BoxLayout:
        orientation: 'horizontal'
        size_hint_y: None
        height: 50
        Label:
            text: 'output colour:'
        Widget:
            canvas:
                Color:
                    rgb: red_slider.value, green_slider.value, blue_slider.value
                Rectangle:
                    size: self.size
                    pos: self.pos
With this code, you should still be able to draw in the DrawingWidget region of the app interface, but the lines still have a random colour each time. Our final task is to make the lines use the colour selected via the sliders.
Let’s start by reassessing where the app’s state should be held. For a start, we need to store somewhere the target colour for the lines. It’s natural to put this inside the DrawingWidget, since this class is what does the drawing and needs to know what colour to use.
The best way to store this data is to use a Kivy property of our own. We’ve made use of many Kivy properties of other widgets already, but this time there isn’t one already created to hold the colour, so it’s time to create one.
Change the DrawingWidget code as follows:
from kivy.properties import ListProperty

class DrawingWidget(Widget):

    target_colour_rgb = ListProperty([0, 0, 0])

    def on_touch_down(self, touch):
        super(DrawingWidget, self).on_touch_down(touch)

        if not self.collide_point(*touch.pos):
            return

        with self.canvas:
            Color(random(), random(), random())
            self.line = Line(points=[touch.pos[0], touch.pos[1]], width=2)

    def on_touch_move(self, touch):
        if not self.collide_point(*touch.pos):
            return

        self.line.points = self.line.points + [touch.pos[0], touch.pos[1]]
That’s all it takes to define a new Kivy property, and it automatically has all the behaviour you’ve seen so far. For instance, if you change the target_colour_rgb of a DrawingWidget instance, an event is automatically dispatched. In fact because this is a ListProperty an event will be dispatched even if we just change the value of an item of the list! There are other types of Kivy property for ensuring correct event dispatching with different types of object (list, dict, int/float, generic objects etc.), which you can find in the documentation.
Note: It may look a little strange that we’ve defined the property at the class level (no reference to self.target_colour_rgb), and it is clearly a ListProperty and not an actual list so how does accessing its values work? The answer is that Kivy properties are descriptors, which are defined at the class level but here are coded to behave like normal lists/ints/whatever when accessed from a class instance. You don’t need to worry about these details, just consider the properties as normal attributes of your objects when accessing them.
As an example of what that really means, lets hook up the property to change so that we can respond to these events. Change your kv file <Interface> rule to read as follows:
<Interface>:
    orientation: 'vertical'
    DrawingWidget:
        target_colour_rgb: red_slider.value, green_slider.value, blue_slider.value  # <- new line
    ColourSlider:
        id: red_slider
    ColourSlider:
        id: green_slider
    ColourSlider:
        id: blue_slider
    BoxLayout:
        orientation: 'horizontal'
        size_hint_y: None
        height: 50
        Label:
            text: 'output colour:'
        Widget:
            canvas:
                Color:
                    rgb: red_slider.value, green_slider.value, blue_slider.value
                Rectangle:
                    size: self.size
                    pos: self.pos
Note that the only new line here sets the value of target_colour_rgb based on the values of the sliders. We’re once again taking advantage of automatic kv event binding: whenever any of red_slider.value, green_slider.value or blue_slider.value changes then this line will be re-evaluated to update target_colour_rgb. We can add some code to prove that it’s working, via a new method in the DrawingWidget class:
def on_target_colour_rgb(self, instance, value):
    print(f"target_colour_rgb changed to {self.target_colour_rgb}")
A method with this name will be called automatically whenever the target_colour_rgb property changes - this is another handy feature of Kivy event dispatching, instead of binding explicitly this default event method is always available. You can consider that code something like self.bind(target_colour_rgb=self.on_target_colour_rgb) has been automatically run to create the event binding.
Now, run the application and move the values of the sliders. You should see code printed in your terminal every time a slider moves, because every movement updates the value of target_colour_rgb:
target_colour_rgb changed to [0.20853658536585365, 0.6012195121951219, 0.4573170731707317]
target_colour_rgb changed to [0.20853658536585365, 0.6012195121951219, 0.4585365853658537]
target_colour_rgb changed to [0.20853658536585365, 0.6012195121951219, 0.45975609756097563]
Note: The colour changes in this example are very small because you’re getting an update every time the slider moves even a single pixel!
The final step is to make the DrawingWidget use this target colour for the next line it draws. For this we just have to update the on_touch_down method:
def on_touch_down(self, touch):
    super(DrawingWidget, self).on_touch_down(touch)

    if not self.collide_point(*touch.pos):
        return

    with self.canvas:
        Color(*self.target_colour_rgb)  # <- this line changed
        self.line = Line(points=[touch.pos[0], touch.pos[1]], width=2)
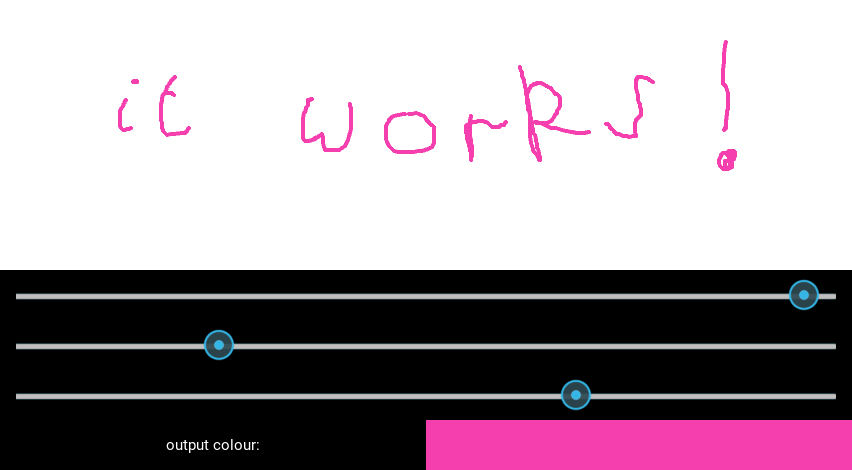
That’s all there is to it! When we make the new Color instruction for the new line, we pass in the current value of our property instead of selecting random values.
Run the app now and every line should match your currently selected colour:
For a further example, let’s add a similar method to set the Line width. Again, we add a Kivy property to DrawingWidget:
from kivy.properties import ListProperty, NumericProperty

class DrawingWidget(Widget):
    target_colour_rgb = ListProperty([0, 0, 0])
    target_width_px = NumericProperty(0)
Then in the kv <Interface> rule we add a Slider to select the width, and connect it to the property:
<Interface>:
    orientation: 'vertical'
    DrawingWidget:
        target_colour_rgb: red_slider.value, green_slider.value, blue_slider.value
        target_width_px: width_slider.value
    ColourSlider:
        id: red_slider
    ColourSlider:
        id: green_slider
    ColourSlider:
        id: blue_slider
    BoxLayout:
        orientation: 'horizontal'
        size_hint_y: None
        height: 50
        Label:
            text: 'output colour:'
        Widget:
            canvas:
                Color:
                    rgb: red_slider.value, green_slider.value, blue_slider.value
                Rectangle:
                    size: self.size
                    pos: self.pos
    BoxLayout:
        orientation: 'horizontal'
        size_hint_y: None
        height: 50
        Label:
            text: "width: {}".format(width_slider.value)
        Slider:
            id: width_slider
            min: 2
            max: 10
            value: 2
And finally, update the DrawingWidget.on_touch_down to use the currently-selected width for the new Line instruction:
def on_touch_down(self, touch):
    super(DrawingWidget, self).on_touch_down(touch)

    if not self.collide_point(*touch.pos):
        return

    with self.canvas:
        Color(*self.target_colour_rgb)
        self.line = Line(points=[touch.pos[0], touch.pos[1]],
                         width=self.target_width_px)
Note: I’ve added not just a single Slider, but a new BoxLayout to the kv rule, in order to display a Label indicating what the slider is for. Notice how, consistent with everything so far, the Label automatically updates to always show the current value of the Slider.
Run the app and try the drawing. You should now be able to control both the colour and width of every line:
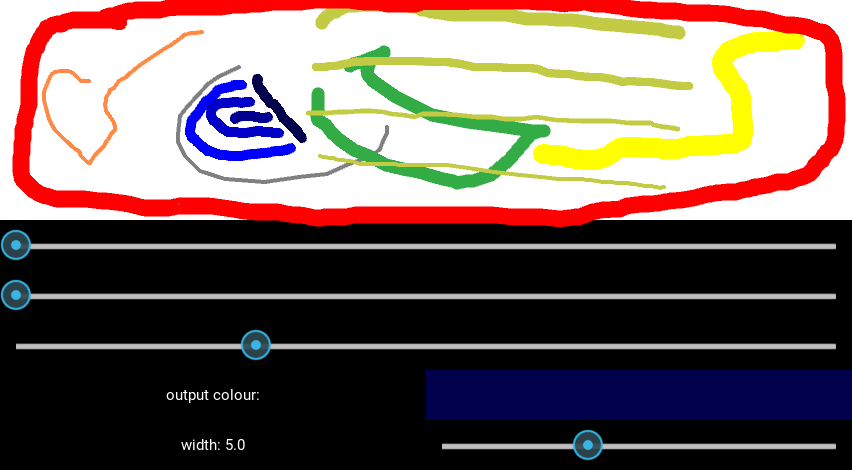
With that, the application is fully connected together. We have a UI element for drawing, alongside extra elements for controlling the details of the lines, with data passed around using Kivy properties. These basic ideas are at the heart of all Kivy applications.
This would be a good time to experiment. Try adding or removing widgets, and maybe adding more customisation to the lines.
Full code
main.py:

from kivy.app import App
from kivy.uix.boxlayout import BoxLayout
from kivy.uix.slider import Slider

from kivy.uix.boxlayout import BoxLayout
from kivy.uix.label import Label
from kivy.uix.slider import Slider

from kivy.uix.widget import Widget
from kivy.graphics import Rectangle, Color, Line

from kivy.properties import ListProperty, NumericProperty

from random import random

class DrawingWidget(Widget):
    target_colour_rgb = ListProperty([0, 0, 0])
    target_width_px = NumericProperty(0)

    def on_touch_down(self, touch):
        super(DrawingWidget, self).on_touch_down(touch)

        if not self.collide_point(*touch.pos):
            return

        with self.canvas:
            Color(*self.target_colour_rgb)
            self.line = Line(points=[touch.pos[0], touch.pos[1]],
                            width=self.target_width_px)

    def on_touch_move(self, touch):
        if not self.collide_point(*touch.pos):
            return

        self.line.points = self.line.points + [touch.pos[0], touch.pos[1]]

    def on_target_colour_rgb(self, instance, value):
        print(f"target_colour_rgb changed to {self.target_colour_rgb}")


class Interface(BoxLayout):
    pass

class DrawingApp(App):

    def build(self):
        root_widget = Interface()
        return root_widget

DrawingApp().run()
drawing.kv:
<DrawingWidget>:
    canvas:
        Color:
            rgba: 1, 1, 1, 1
        Rectangle:
            pos: self.pos
            size: self.size

<ColourSlider@Slider>:
    min: 0
    max: 1
    value: 0.5
    size_hint_y: None
    height: 50


<Interface>:
    orientation: 'vertical'
    DrawingWidget:
        target_colour_rgb: red_slider.value, green_slider.value, blue_slider.value
        target_width_px: width_slider.value
    ColourSlider:
        id: red_slider
    ColourSlider:
        id: green_slider
    ColourSlider:
        id: blue_slider
    BoxLayout:
        orientation: 'horizontal'
        size_hint_y: None
        height: 50
        Label:
            text: 'output colour:'
        Widget:
            canvas:
                Color:
                    rgb: red_slider.value, green_slider.value, blue_slider.value
                Rectangle:
                    size: self.size
                    pos: self.pos
    BoxLayout:
        orientation: 'horizontal'
        size_hint_y: None
        height: 50
        Label:
            text: "width: {:.1f}".format(width_slider.value)
        Slider:
            id: width_slider
            min: 2
            max: 10
            value: 2