Kivy hackathon in paris

Last week saw the first 24h hackathon event entirely dedicated to Kivy happening, in Paris. It was initiated by a hightly motivated student of the Cifacom school in paris, David Scheck, and attended by 4 groups of students, each with 3 to 5 members. I was pleased to share the hard task to help students discover the technology with my colleague Julien Miotte, from Majerti during the event.

The student weren’t very familiar with Python, and totally new to kivy, so it was a really challenging situation for both the student and the framework, would they be able to achieve anything in the hard limit of 24 hours?

First, after the students brainstormed on their project ideas, we got them through the major concepts and important classes of Kivy, using the Getting started page, it’s hard to get the point of properties accross in 10 minutes to student that didn’t have experienced the need of them, but I tried to at least make them aware it would be useful. The kv language presentation at this point, even if rudimentary, was probably useful, as we will see later.

Then students went on to try to build their project, except for a few quickly solved issues with windows installation, the starting was smooth. Julien and I gave some more explanations about how to start building a basic App (the doc is there, but who reads the doc? ;)) and people started designing their interface, and build the core of their application.

Eat Smart

One of the most required feature was certainly the use of multiple screens in an application, to build menu, so the use of ScreenManager was explained to at least two groups. Most of the end results consisted of interfaces done mainly in Kv, and some internal logic to display data, most group had a quite ambitious target, using geolocalisation, databases, complex interactions, and I wasn’t very optimistic on the odds of seeing them completed. Although I was right in that, I was still happy of the good designs they came up with, applications were incomplete (to a notable exception, will come back to that soon), but some interfaces were beautiful, reactive and engaging, so it was nice to see the magic happen in such a short time.

Floor2be

One group had a very different objective of the others, and although they had a difficult start, it turns out they were probably the best at teamwork, and had chosen a target they could actually achieve, a game! These motivated coders/artists came up with a classic 2D sidescroller, when the main character has to avoid elements on her way. Simple, to the point, and a quite a good realisation in such a short time, the fact that they created original artworks and integrated them in their game, and that the general theme had a nice touch of humour in the current political events in France certainly hearned them points, on top of having a completed project. They even could test it on Android during the competition time, and it was running perfectly. Their hard work earned them the right to run in a bigger international competition in the near future the angel hack in paris, next month, congratulation! I can only hope they’ll chose kivy as their secret weapon in this competion too.

The BoutinRun team at work

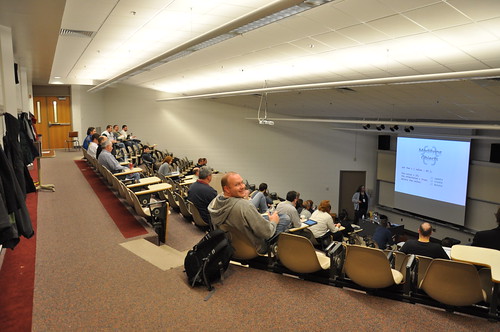
I would love to have better pictures, but i didn’t think much of taking them during the event, I should have better ones soon.

GRDevDay 2013 and My Kivy Talk

I was lucky enough to give a talk about Kivy – a multi-touch, cross-platform Python GUI and application framework – at GRDevDay 2013. Although my talk was the least-attended talk I went to all day, I enjoyed giving it and I got to meet a few new Python folks from Michigan. I’m going to chalk up the attendance to the fact that I was in the same time slot as a lot of good talks, including three that I wanted to see myself. Ah well, such are conferences. At any rate, it gave me an opportunity to see what worked and what didn’t in this talk so I can make some changes before I give it at MobiDevDay Detroit in May.

Watching the

Watching the “So you think you know Javascript” talk at GRDevDay

GRDevDay was a great conference. The organizers really treat the speakers well with a semi-private speaker’s lounge and even special gifts. This is one of the few local events that I attend where I don’t do any organizing, and even though I feel like kind of a slacker, it also feels good to not have all of that pressure for the whole day. The GitHub-hosted drink-up at Kitchen76 was unbelievably crowded, but I still had fun and got to talk at length with some people I usually chat with infrequently online.

For those interested, I’ve posted the slides from my Kivy talk to Speaker Deck, and you can find the tutorial as it existed for the talk in this repository on GitHub.

[Edit 2013-03-05]
There were a few questions I was unable to answer at my GRdevDay talk. As I find answers, I will post them here.

Question: Can you make Android widgets using Kivy?
Answer: Probably not, but there has been a lot of work in pyjnius. No one has tried it recently.

[Edit 2013-03-07]
In my talk I said that you have to specify Android permissions in the Manifest.xml file. This is incorrect, you specify the permissions as part of the build command. See the Python for Android docs for more information.

Crowdfunding Kivy on Raspberry Pi

Kivy doesn’t run yet on the Raspberry Pi, and we need your help to crowdfund it!
Even is Kivy is built to be compatible for GLES 2.0, we lack of a python EGL support.

The plan is to add a new EGL Window provider, in addition to the detection of non-multitouch devices such as keyboard and mouse.

All the informations are available at: https://www.bountysource.com/#fundraisers/143-kivy-on-raspberry-pi

Debugging python-for-android with gdb

So i’ve been sinking a lot of time in trying to make python-for-android support multiprocessing, and for various reasons, it turns out to be a bad idea®, but in doing that, i had to go to great extents to understand more about python-for-android, about gdb, and about android itself. So, if it can save some trouble to others, i’ll try to document here the things i found how to do in this situation.

So the first thing to do is to get python-for-android compiled with debug symbols, so you can feed gdb with them, i found android-ndk-r8b to work much better after (well, to work at all), so it’s good to start with it, i put my changes in a branch of python-for-android repository, aptly called `debug` but they are not that big in fact, it’s mostly removing stripping in places, and adding -g in others.

With those changes, one can build a python-for-android distribution usable for debugging.

./distribute.sh -f -m 'kivy' -d debug

then, build your to-be-debugged application with this distribution, and install it, from then, you need a shell access to your android terminal (i use ssh, because adb over wifi is flacky but that’s another story, adb shell is good), you must then check if your terminal has the gdbserver command, if not, you can push it from the ndk to the terminal, and give it execution rights.

adb push ~/android-ndk-r8b/prebuilt/android-arm/gdbserver
adb shell
chmod 755 gdbserver

now, you can start your test program (from the UI), and tell gdbserver to attach to it,

ps | grep python
gdbserver :5050 --attach $pid

obviously using the pid found using the command, i use a shortcut though

./gdbserver :5050 --attach $(ps | grep python | tail -n 1 | tr -s " " " "| cut -d" " -f2)

This will tell gdbserver to listen on port 5050 (you can chose about any number between 1024 and 65536) and then the fun part begins

using the gdb in the ndk, load the pymodules.so file

$ ~/android-ndk-r8b/toolchains/arm-linux-androideabi-4.4.3/prebuilt/linux-x86/bin/arm-linux-androideabi-gdb\
 ~/python-for-android/dist/debug/private/libpymodules.so

of course, this path (and the following ones) will need to be adapted to your system!

once in gdb, you’ll want to attach to the gdbserver on your device, i assume you are on the same wifi network as your device, but if not, you can do a port redirection through adb link i think

(gdb) target remote transformer:5050

If everything went fine, you should get a message a bit like this

Remote debugging using transformer:5051
warning: while parsing target library list (at line 2): No segment defined for com.showgen.processcraft.freemium:python
warning: Could not load shared library symbols for 87 libraries, e.g. /system/bin/linker.
Use the "info sharedlibrary" command to see the complete listing.
Do you need "set solib-search-path" or "set sysroot"?
warning: Unable to find dynamic linker breakpoint function.
GDB will be unable to debug shared library initializers
and track explicitly loaded dynamic code.
0x400b9384 in ?? ()

as the helpful message put it, we need to tell gdb where it can load the shared libs with debug symbols. Personnaly i found this setting of `solib-search-path`to work well:

(gdb) set solib-search-path \
/home/gabriel/python-for-android/src/obj/local/armeabi/:\
/home/gabriel/python-for-android/dist/debug/private/lib/python2.7/lib-dynload/:\
/home/gabriel/python-for-android/dist/debug/libs/armeabi/

You can check the result of this by using the command `info sharedlibrary` (or `i sh` for the lazy) to see if symbols have been found, the interresting part for me is:

0x56d31348  0x56d5c148  Yes         /home/gabriel/python-for-android/src/obj/local/armeabi/libsdl.so
0x579b5400  0x579d5798  Yes         /home/gabriel/python-for-android/src/obj/local/armeabi/libsdl_image.so
0x579fa428  0x57a2c1f8  Yes         /home/gabriel/python-for-android/src/obj/local/armeabi/libsdl_ttf.so
0x56a5a6b0  0x56a69c20  Yes         /home/gabriel/python-for-android/src/obj/local/armeabi/libsdl_mixer.so
0x5b985570  0x5bbc9e90  Yes         /home/gabriel/python-for-android/dist/billing/libs/armeabi/libpython2.7.so
0x56a79a1c  0x56a79c04  Yes         /home/gabriel/python-for-android/src/obj/local/armeabi/libapplication.so
0x56dee534  0x56dee5e8  Yes         /home/gabriel/python-for-android/src/obj/local/armeabi/libsdl_main.so
0x57604450  0x5761ed40  Yes         /home/gabriel/python-for-android/dist/billing/private/lib/python2.7/lib-dynload/_io.so
0x57a7426c  0x57a77630  Yes         /home/gabriel/python-for-android/dist/billing/private/lib/python2.7/lib-dynload/unicodedata.so
0x57b5b058  0x57b97d00  Yes         /home/gabriel/python-for-android/src/obj/local/armeabi/libsqlite3.so

Interrestingly, it seems the command is only useful after connecting to the target, doing it in reverse order doesn’t seem to bring any result, so the `search` is probably done only once, whet the search-patch is set.
Now, you can use the command `continue` or set breakpoints, or other rather common usage of gdb there. There are quite some resources out there about gdb usage :)

It’s not perfect, but i found it helping to be able to backtrace things on the tablet, in the nasty case you get a crash, or some weird “OSError”, with an unhelpful message, comming from the C side of things.

For the story, my error was likely caused by memory corruption due to the way we tried to reimplement the multiprocessing use of semaphore (sem_open being not implemented in android), and there is apparently no good way to do it. So i’ll look into android services instead when i have time, and try to give an API in python for that.

[Kivy] android-like pulldown menu

kivy all the things

As someone asked how to do such thing in kivy, i spent some time writting it, and as i (sadly) don’t blog on kivy often (if ever?), and since i think this example is quite telling about how kivy make such things quite easy, let’s talk a bit about this code.

To put things in context, what we want is the bar at the top of the android phones, that one can pull down to see notifications, this one is semi transparent and goes over the normal screen.

So, here is the code. first the kv part:

FloatLayout:
    FloatLayout:
        # placeholder for the "normal screen"
        Label:
            center: root.center
            text: 'test content'
            size_hint: None, None
            size: self.texture_size

    ScrollView:
        # container for the "notifications"
        y: dg.top # let's stick it to the top
        x: root.x # and to the left
        size_hint_y: None
        do_scroll_x: False # only vertical scrolling
        do_scroll_y: True
        
        # most of the magic is there, auto adjust size to follow the draggable label
        height: root.top - dg.y

        # let's put a nearly opaque black background
        canvas:
            Color:
                rgba: 0, 0, 0, .8
            Rectangle:
                pos: self.pos
                size: self.size
        
        # the actual notification container, with placeholder content
        BoxLayout:
            size_hint_y: None
            height: 1000
            orientation: 'vertical'
            Label:
                text: 'test'
            Label:
                text: 'test'
            Label:
                text: 'test'
            Label:
                text: 'test'
            Label:
                text: 'test'
            Label:
                text: 'test'
            Label:
                text: 'test'
            Label:
                text: 'test'
            Label:
                text: 'test'

    # the draggable label, which behaviour is defined in python file
    DraggableLabel:
        # some decoration behind the text
        canvas.before:
            Color:
                rgba: 0, 0, 0, 1
            Rectangle:
                pos: self.pos
                size: self.size
            Color:
                rgba: .5, .5, .5, 1
            Rectangle:
                pos: self.pos
                size: self.width, 1

        size_hint_y: None
        top: root.top
        # assign its id to "dg" so we can reference it elsewhere
        id: dg
        height: '20pt'
        text: 'drag me'

then the python part

from kivy.app import App 
from kivy.uix.label import Label
from kivy.animation import Animation


class DraggableLabel(Label):
    '''A label you can drag upside-down'''
    def on_touch_down(self, touch):
        if self.collide_point(*touch.pos):
            # assure ourselves we will get the updates of this motion
            touch.grab(self)
            return True

        return super(DraggableLabel, self).on_touch_down(touch)

    def on_touch_move(self, touch):
        if touch.grab_current is self:
            # really straightforward...
            self.y = touch.y
            return True

        return super(DraggableLabel, self).on_touch_move(touch)

    def on_touch_up(self, touch):
        if touch.grab_current is self:
            # check if the movement direction was up or down
            if touch.dy < 0:
                a = Animation(y=0) # down? put the bar all the way down
            else:
                a = Animation(top=self.parent.top) # up? put it at the top

            a.start(self) # actually start the animation
            return True

        return super(DraggableLabel, self).on_touch_up(touch)


class TabApp(App):
    pass


TabApp().run()


I think it doesn’t really need more explanations, the DraggableLabel is looking for touch events that are for it, first if they are on it, then if they are grabbed by itself, and move accordingly, and the kv auto adjust the size of the ScrollView to take all the distance between top of the screen and top of the DraggableLabel.

Of course, if things are not clear, feel free to ask questions :)

Pyjnius: Accessing Java classes from Python

We’re pleased to announce the Pyjnius project. It’s a Python library to access Java classes from Python, on the desktop or on Android.

We found others libraries such as JPype or Py4j, but we weren’t happy with the design and the usability. Using Jython wasn’t an option either, because we wanted to use the library within our python for android project.

Let me show you how simple it is to use Pyjnius:

>>> from jnius import autoclass
>>> Stack = autoclass('java.util.Stack')
>>> stack = Stack()
>>> stack.push('hello')
>>> stack.push('world')
>>> stack.pop()
'world'
>>> stack.pop()
'hello'

What we demonstrate here is the autoclass function that create kind-of proxy that reflect all the methods and fields available from the Java class java.util.Stack.

Ok, maybe you want an Android-related example? Just have a look:

from jnius import autoclass
from time import sleep

MediaRecorder = autoclass('android.media.MediaRecorder')
AudioSource = autoclass('android.media.MediaRecorder$AudioSource')
OutputFormat = autoclass('android.media.MediaRecorder$OutputFormat')
AudioEncoder = autoclass('android.media.MediaRecorder$AudioEncoder')

# Record the Microphone with a 3GP recorder
mRecorder = MediaRecorder()
mRecorder.setAudioSource(AudioSource.MIC)
mRecorder.setOutputFormat(OutputFormat.THREE_GPP)
mRecorder.setOutputFile('/sdcard/testrecorder.3gp')
mRecorder.setAudioEncoder(AudioEncoder.ARM_NB)
mRecorder.prepare()

# Record 5 seconds
mRecorder.start()
sleep(5)
mRecorder.stop()
mRecorder.release()

More examples are available in the documentation. We have a mapping between Java/Python type, native arrays, support for methods with multiple signatures, and a lot more. We are using Cython + JNI internally. The performance cost is minimal.

The library is already available for Python for android.

The library have been done by Gabriel Pettier and myself, under the Kivy organization.