Running buildozer in a virtual machine

This guide describes how to turn your Kivy/Python app into an APK, by running the buildozer build tool in a virtual machine. This is not the only way to run buildozer, it can work natively on Linux or MacOS or be run from the Windows Subsystem for Linux. See the Kivy documentation for more general instructions.

Creating a Virtual Machine

I’ll be using VirtualBox. Other virtualisation software should also work, but you’ll need to adapt the specific instructions.

We also need a target OS. I recommend Lubuntu 18.04, available here (or direct download link). Lubuntu is a light weight Ubuntu variant. You can also use a different distro if you like, but may need to adapt the later instructions.

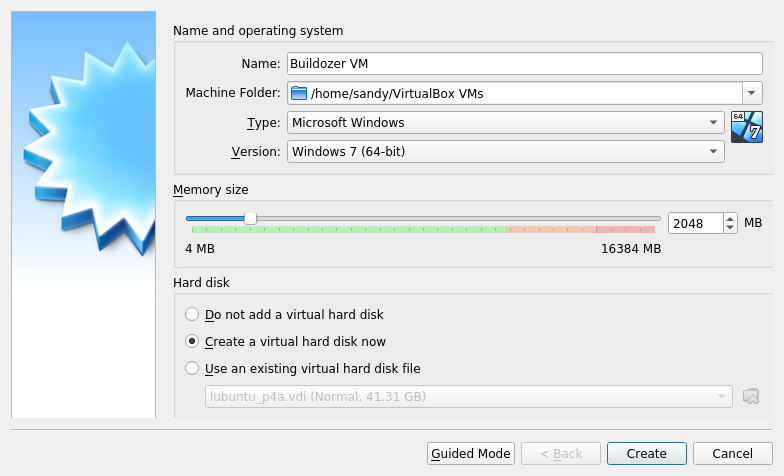
Once you have downloaded the Lubuntu iso file, start VirtualBox and press New to create a new virtual machine. You’ll see a dialog like the following:

New VM dialog

Fill in the other options as shown in the image. It’s fine to set a larger memory size if you have enough available, or less may also work fine. Then press Create to continue.

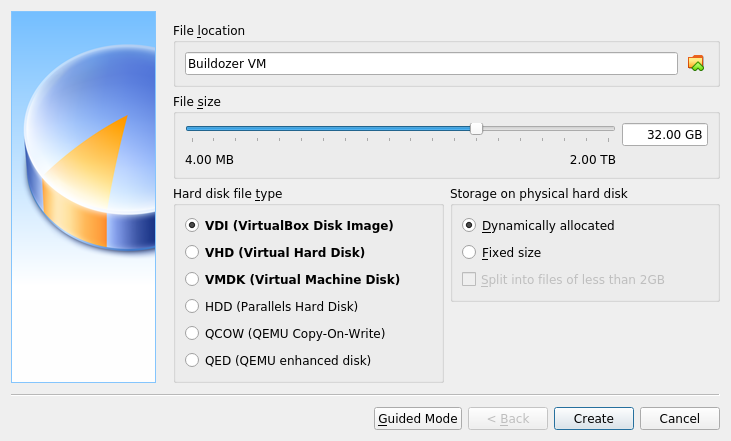
Disk image creation dialog

You now need to select a file size for your virtual hard disk. 15 GB should be sufficient, but it’s safest to double that. Leave the other options unchanged and choose Create to continue.

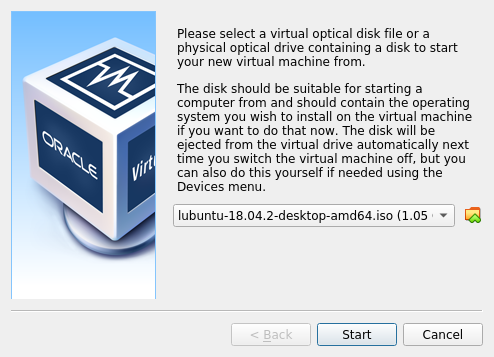
Now, select your new VM and click Start in the main VirtualBox GUI. You should be prompted to select a virtual optical disk to boot from:

Choose iso to boot

Navigate to your Lubuntu 18.04 iso downloaded earlier, as shown, and press Start to continue. The first screen you see should look something like the following:

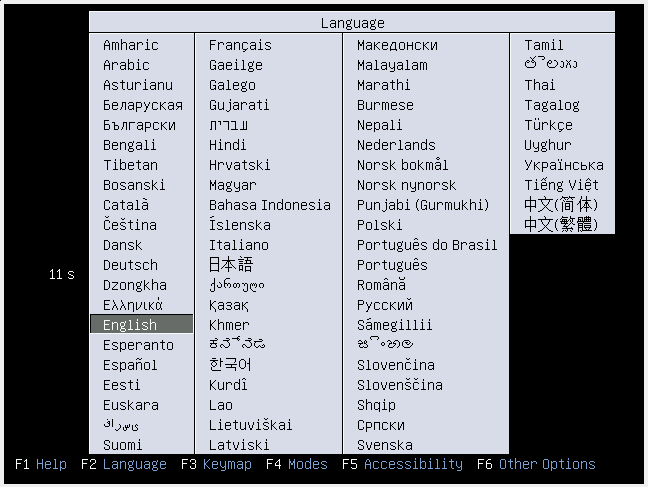
Select language

Select your language to see the boot menu:

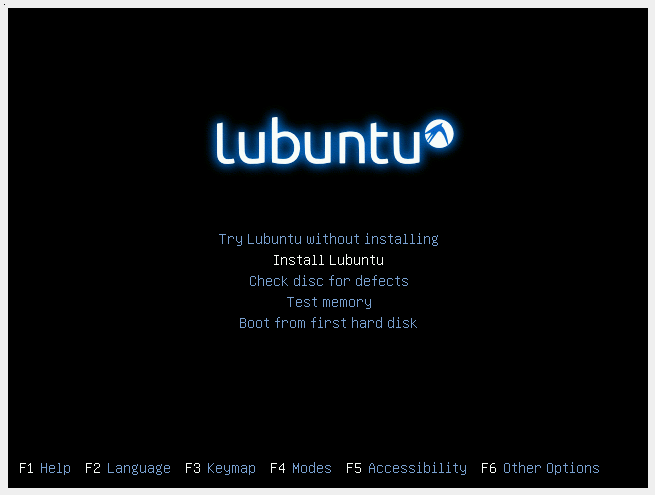
Choose boot option

Choose the second option, “Install Lubuntu”. It doesn’t matter if you accidentally press enter to “Try Lubuntu without installing”, in this case there should be an Install Lubuntu application on the desktop that you can click to continue the install process.

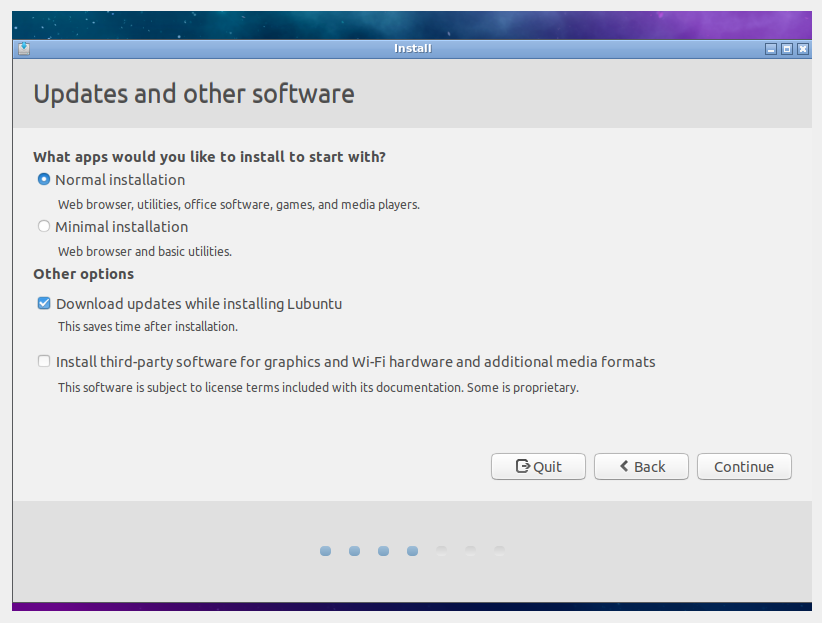
You’ll be shown a series of dialogs to help prepare the install process. Clicking through with the defaults is fine, or select other options if you prefer.

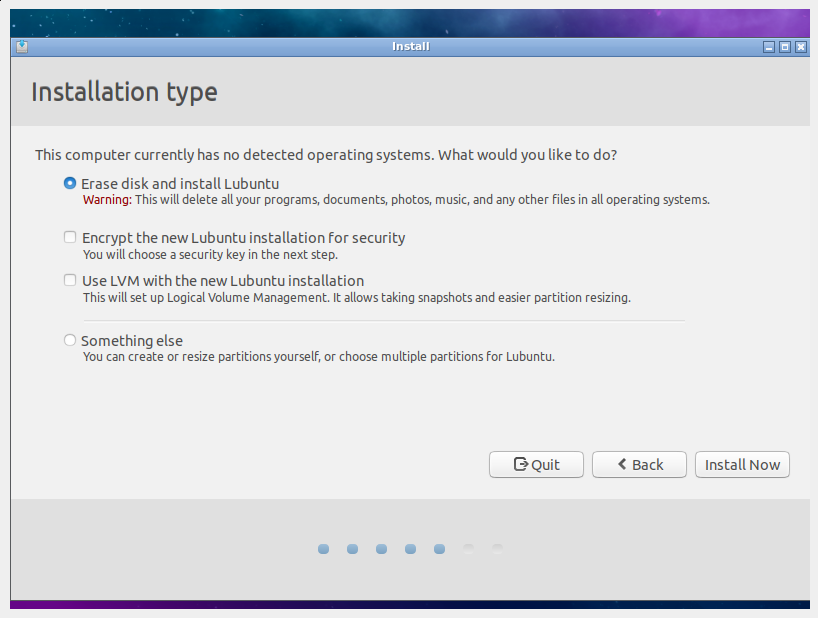
The fourth screen will ask what kind of install to use, as shown:

Choose install type

The options shown above should be the defaults, and are what you want to use, so go ahead and continue.

Choose partitioning options

Next, select “Erase disk and install Lubuntu”. Note that this is only erasing the (emtpy) virtual disk image created earlier, it won’t affect your host operating system.

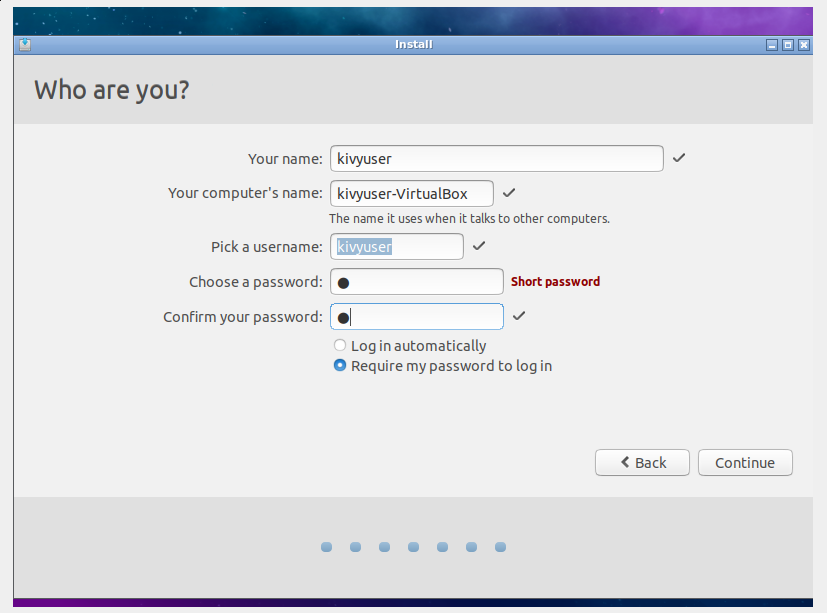
Click through again, and you’ll eventually reach the user creation screen. It doesn’t matter what your username is, I used kivyuser:

User creation dialog

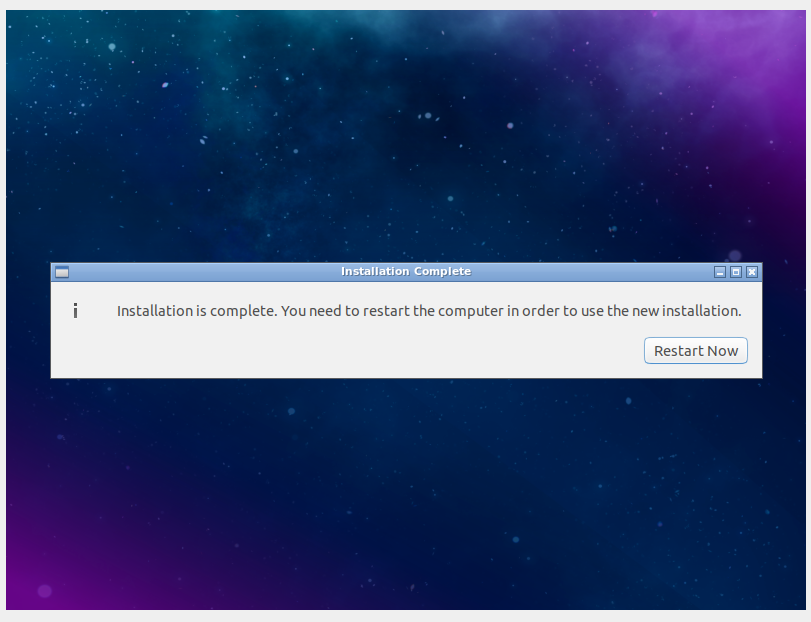
Click “Continue” to finally start the install. You’ll be asked a few more questions, but eventually will just have to wait for the installation to complete. This shouldn’t take too long. You’ll be prompted to “Restart Now”, which you should go ahead and do.

Restart Now screen

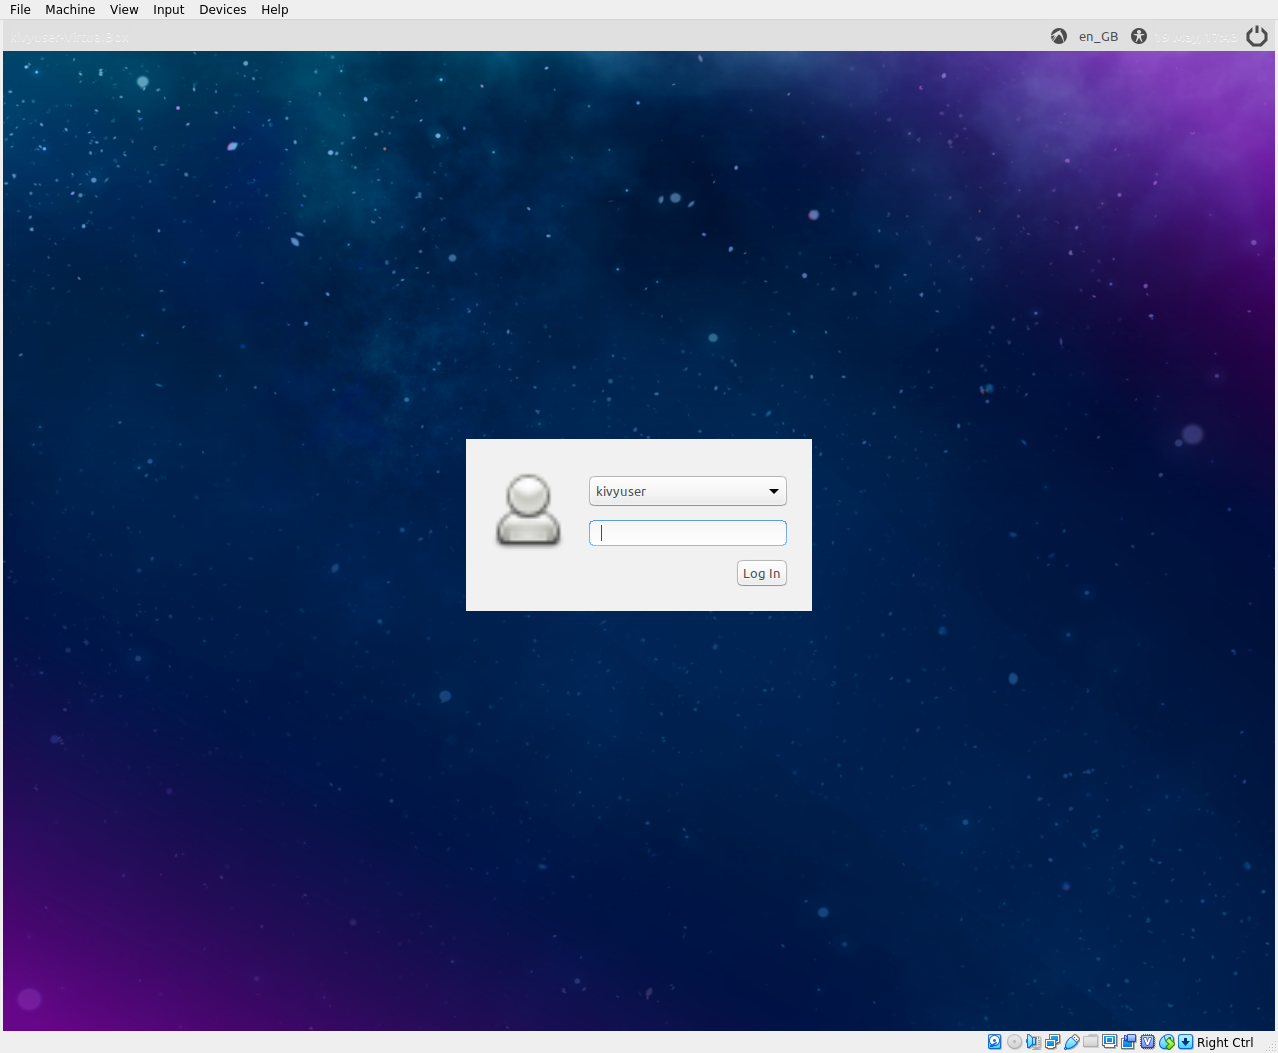
If you have any issues with the virtual machine failing to reboot, go ahead and select Machine > Reset in the VirtualBox menu, it doesn’t matter how you do it as long as the machine is reset. If all goes well, Lubuntu should now automatically boot to a login screen - congratulations, your virtual machine is ready to use! Enter your username and password, and proceed to the next section of instructions.

Login screen

Setting up buildozer

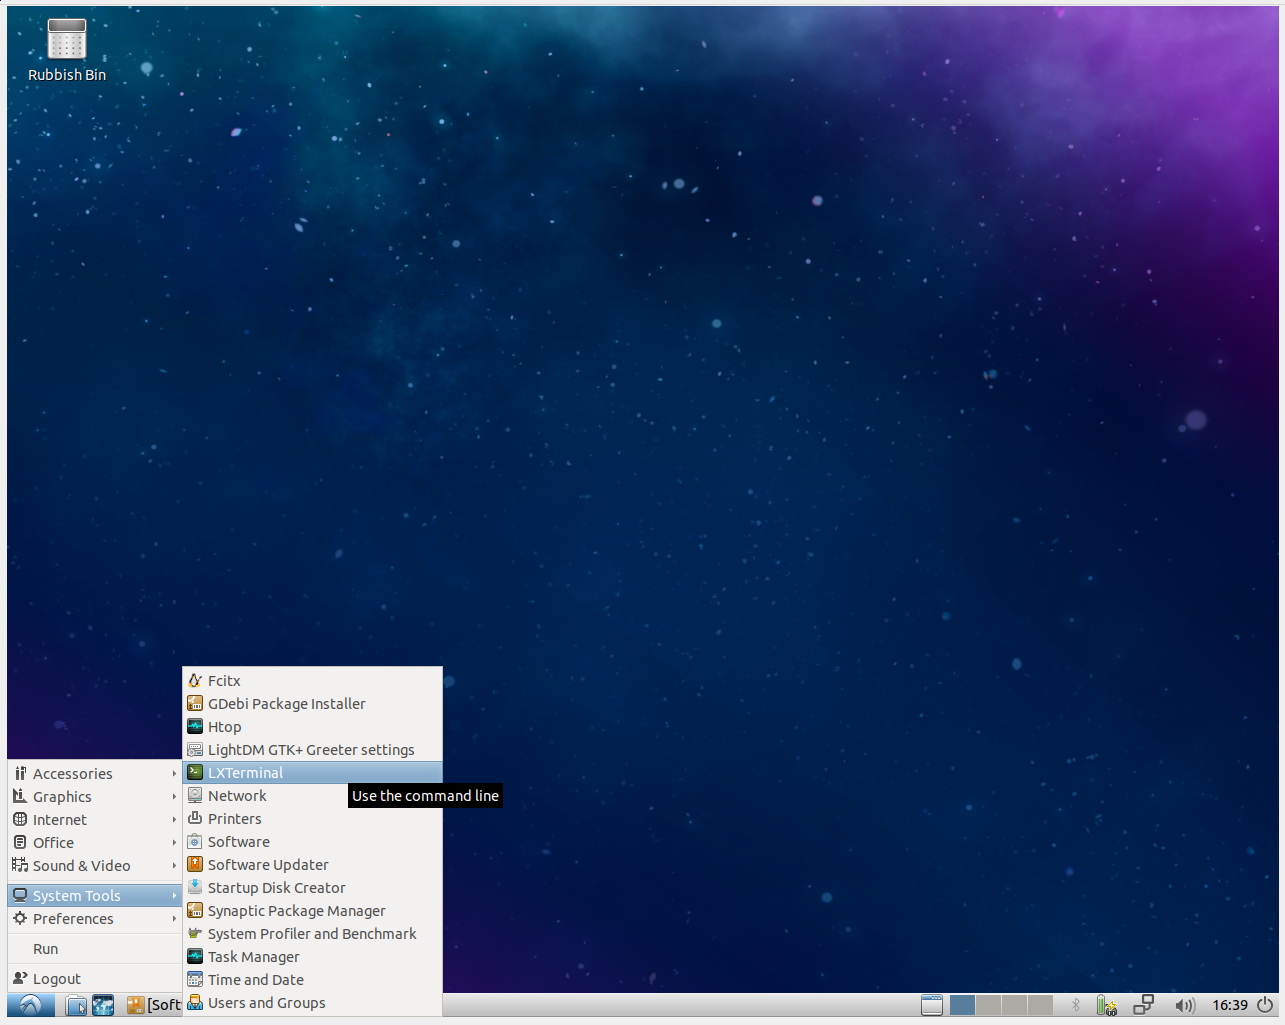
We can now go ahead and set up buildozer ready to build your app. Open an LXTerminal as below:

LXTerminal location in menu

We now have to run a few commands to install everything buildozer needs to run. Run the following command to do so, and enter your user’s password if prompted:

sudo apt-get install python3-pip openjdk-8-jdk autoconf libtool python3-venv

That should give us everything we need for a basic app, so we can go ahead and install buildozer:

python3 -m venv buildozer-env
source buildozer-env/bin/activate
pip install buildozer cython

Note that we installed cython as well, this is also required for building the APK.

You only have to create the virtual environment once, but if you reboot the virtual machine you’ll need to run source buildozer-env/bin/activate again. See the Python documentation for more details.

The final step before running buildozer is to have your app ready in the virtual machine. You can access a folder in your host machine using VirtualBox shared folders (in the Devices > Shared Folders menu), but I won’t cover the details here. Note though that if you do this you must copy the folder contents to a different folder within the virtual machine, the buidozer process will not work if run within a shared folder.

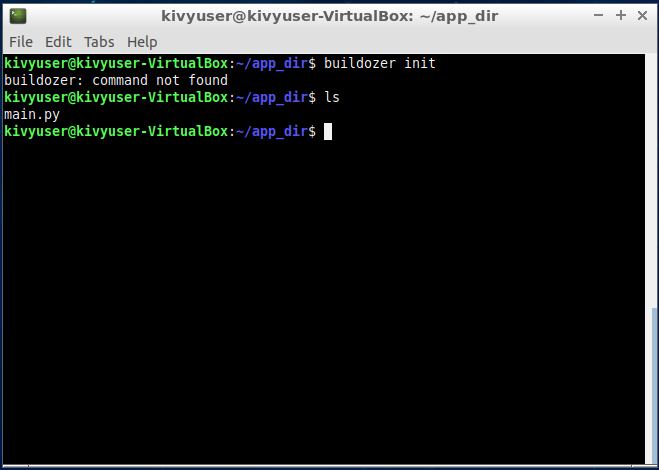
In the following instructions I’ll assume you’ve created a folder named app_dir and placed a main.py file inside it containing your application code. Navigate to this folder in the terminal (cd app_dir) and run:

buildozer init

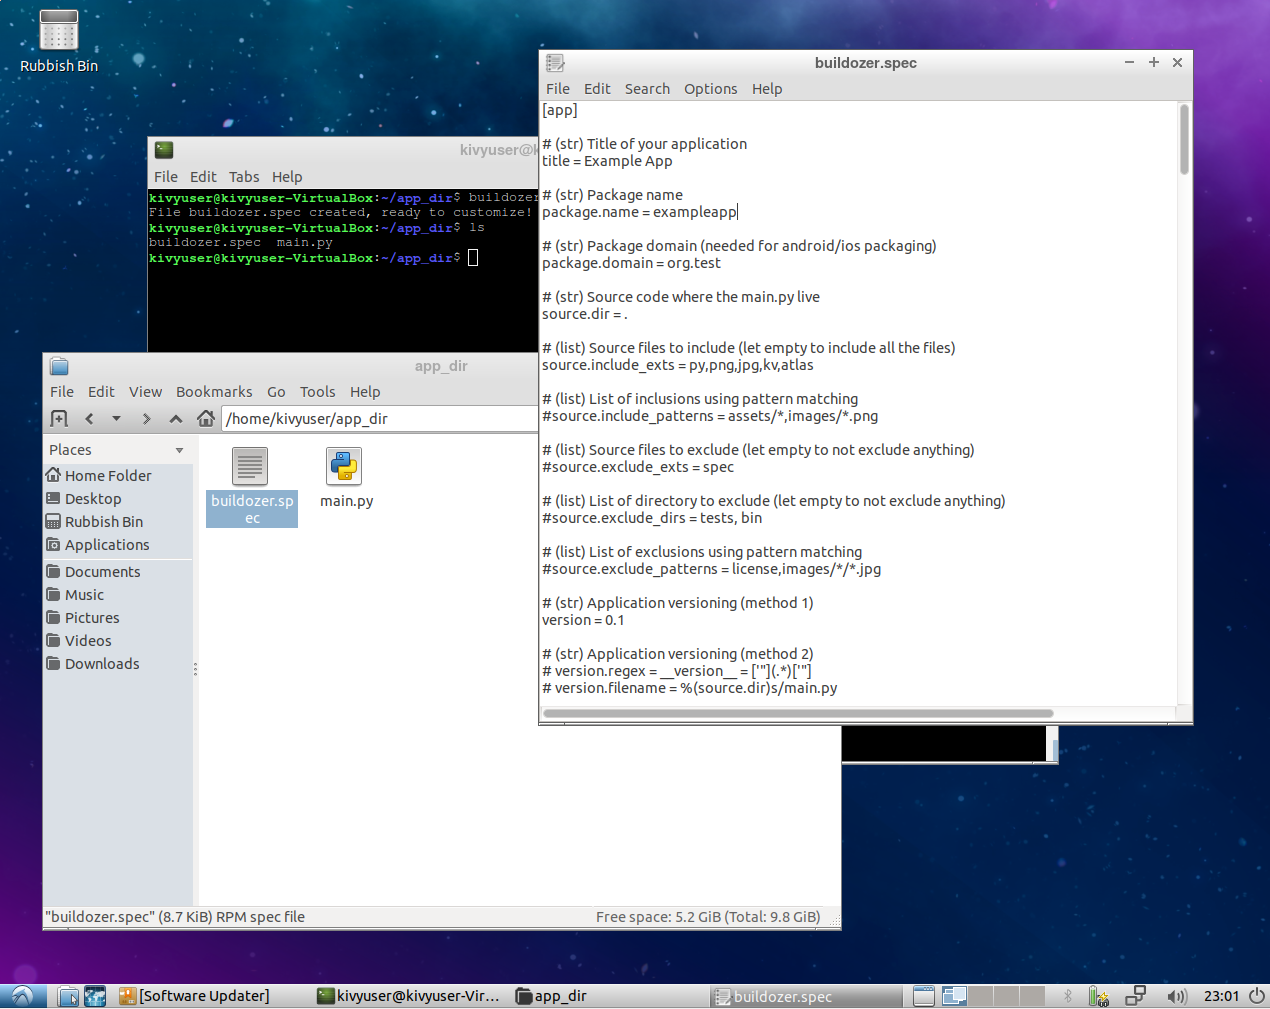
This will create a buildozer.spec file alongside your main.py:

Creating buildozer.spec

Edit the buildozer.spec to set any options you like. In this example I’ve changed only the title and pacakge.name options:

Editing buildozer.spec

I recommend changing very little for this first build, to make sure everything works. It won’t cause any problems if you edit the buildozer.spec again later.

Running buildozer

We’re now ready to actually build the app into an APK file. Start the process with:

buildozer -v android debug

The -v option asks for verbose output. This is recommended so that you can keep an eye on what’s happening - the details aren’t too important, but you should be able to see that the process never stops in one place for too long.

Buildozer will now download the Android tools it needs. This may take a while.

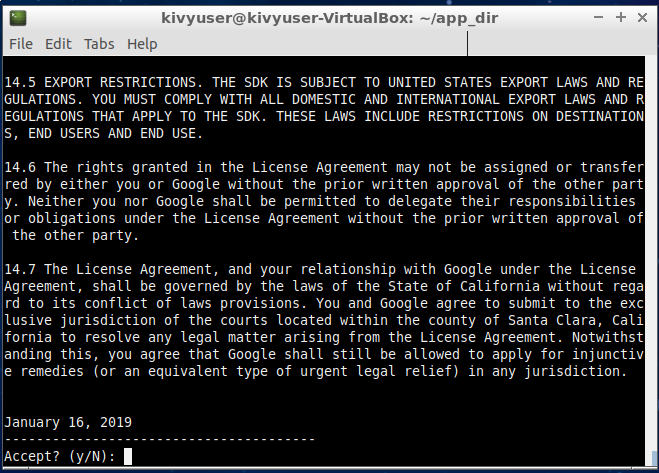
At some point you’ll be asked to accept the Android SDK license agreement, which is printed for you as in the following image:

SDK license agreement

At this point, press “y” and then enter to accept the agreement (or abort the process if you don’t agree). This is necessary even if you don’t see any text asking you to do so, due to a bug in buildozer (fixed in the next release).

After downloading everything it needs, buildozer will work through the build process compiling and packaging each of the components for your app. This may take a while, but as long as it doesn’t crash then everything is fine. Future builds will be much faster unless you change the build options, as only the contents of your app itself will need re-packaging.

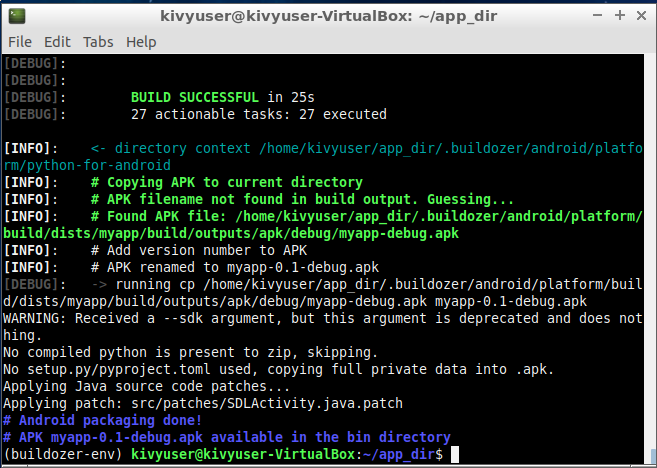
Eventually the build will complete, you’ll see a screen like the following:

Build complete

That’s it, you’re done! You can find the finished APK in the bin directory, as noted in the final message buildozer prints.

Running buildozer in a virtual machine

This guide describes how to turn your Kivy/Python app into an APK, by running the buildozer build tool in a virtual machine. This is not the only way to run buildozer, it can work natively on Linux or MacOS or be run from the Windows Subsystem for Linux. See the Kivy documentation for more general instructions.

Creating a Virtual Machine

I’ll be using VirtualBox. Other virtualisation software should also work, but you’ll need to adapt the specific instructions.

We also need a target OS. I recommend Lubuntu 18.04, available here (or direct download link). Lubuntu is a light weight Ubuntu variant. You can also use a different distro if you like, but may need to adapt the later instructions.

Once you have downloaded the Lubuntu iso file, start VirtualBox and press New to create a new virtual machine. You’ll see a dialog like the following:

New VM dialog

Fill in the other options as shown in the image. It’s fine to set a larger memory size if you have enough available, or less may also work fine. Then press Create to continue.

Disk image creation dialog

You now need to select a file size for your virtual hard disk. 15 GB should be sufficient, but it’s safest to double that. Leave the other options unchanged and choose Create to continue.

Now, select your new VM and click Start in the main VirtualBox GUI. You should be prompted to select a virtual optical disk to boot from:

Choose iso to boot

Navigate to your Lubuntu 18.04 iso downloaded earlier, as shown, and press Start to continue. The first screen you see should look something like the following:

Select language

Select your language to see the boot menu:

Choose boot option

Choose the second option, "Install Lubuntu". It doesn’t matter if you accidentally press enter to "Try Lubuntu without installing", in this case there should be an Install Lubuntu application on the desktop that you can click to continue the install process.

You’ll be shown a series of dialogs to help prepare the install process. Clicking through with the defaults is fine, or select other options if you prefer.

The fourth screen will ask what kind of install to use, as shown:

Choose install type

The options shown above should be the defaults, and are what you want to use, so go ahead and continue.

Choose partitioning options

Next, select "Erase disk and install Lubuntu". Note that this is only erasing the (emtpy) virtual disk image created earlier, it won’t affect your host operating system.

Click through again, and you’ll eventually reach the user creation screen. It doesn’t matter what your username is, I used kivyuser:

User creation dialog

Click "Continue" to finally start the install. You’ll be asked a few more questions, but eventually will just have to wait for the installation to complete. This shouldn’t take too long. You’ll be prompted to "Restart Now", which you should go ahead and do.

Restart Now screen

If you have any issues with the virtual machine failing to reboot, go ahead and select Machine > Reset in the VirtualBox menu, it doesn’t matter how you do it as long as the machine is reset. If all goes well, Lubuntu should now automatically boot to a login screen - congratulations, your virtual machine is ready to use! Enter your username and password, and proceed to the next section of instructions.

Login screen

Setting up buildozer

We can now go ahead and set up buildozer ready to build your app. Open an LXTerminal as below:

LXTerminal location in menu

We now have to run a few commands to install everything buildozer needs to run. Run the following command to do so, and enter your user’s password if prompted:

sudo apt-get install python3-pip openjdk-8-jdk autoconf libtool python3-venv

That should give us everything we need for a basic app, so we can go ahead and install buildozer:

.. code-block:: sh
python3 -m venv buildozer-env source buildozer-env/bin/activate pip install buildozer cython

Note that we installed cython as well, this is also required for building the APK.

You only have to create the virtual environment once, but if you reboot the virtual machine you’ll need to run source buildozer-env/bin/activate again. See the Python documentation for more details.

The final step before running buildozer is to have your app ready in the virtual machine. You can access a folder in your host machine using VirtualBox shared folders (in the Devices > Shared Folders menu), but I won’t cover the details here. Note though that if you do this you must copy the folder contents to a different folder within the virtual machine, the buidozer process will not work if run within a shared folder.

In the following instructions I’ll assume you’ve created a folder named app_dir and placed a main.py file inside it containing your application code. Navigate to this folder in the terminal (cd app_dir) and run:

.. code-block:: sh
buildozer init

This will create a buildozer.spec file alongside your main.py:

Creating buildozer.spec

Edit the buildozer.spec to set any options you like. In this example I’ve changed only the title and pacakge.name options:

Editing buildozer.spec

I recommend changing very little for this first build, to make sure everything works. It won’t cause any problems if you edit the buildozer.spec again later.

Running buildozer

We’re now ready to actually build the app into an APK file. Start the process with:

.. code-block:: sh
buildozer -v android debug

The -v option asks for verbose output. This is recommended so that you can keep an eye on what’s happening - the details aren’t too important, but you should be able to see that the process never stops in one place for too long.

Buildozer will now download the Android tools it needs. This may take a while.

At some point you’ll be asked to accept the Android SDK license agreement, which is printed for you as in the following image:

SDK license agreement

At this point, press "y" and then enter to accept the agreement (or abort the process if you don’t agree). This is necessary even if you don’t see any text asking you to do so, due to a bug in buildozer (fixed in the next release).

After downloading everything it needs, buildozer will work through the build process compiling and packaging each of the components for your app. This may take a while, but as long as it doesn’t crash then everything is fine. Future builds will be much faster unless you change the build options, as only the contents of your app itself will need re-packaging.

Eventually the build will complete, you’ll see a screen like the following:

Build complete

That’s it, you’re done! You can find the finished APK in the bin directory, as noted in the final message buildozer prints.
Kivy Hackathon and FOSDEM 2019

For the last 3 days several of the Kivy Core Developers gathered in Brussels, Belgium for the first ever core developer hackathon. Not only is this the first time we’ve gathered to work on Kivy framework issues, but for most of us the first time we’ve ever met - even after years of collaboration!

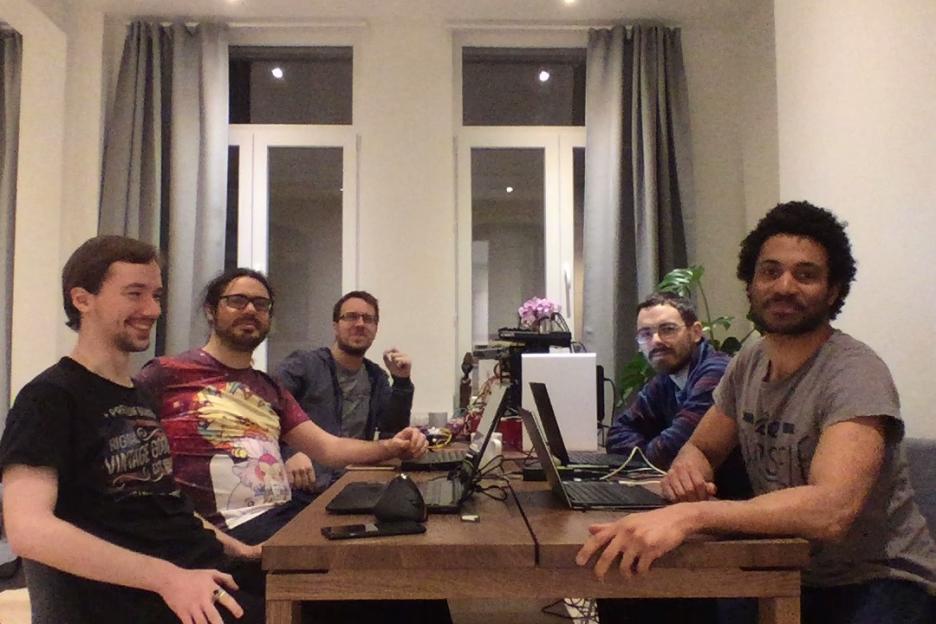
From left to right: Peter Badida (KeyWeeUsr), Gabriel Pettier (tshirtman), Mathieu Virbel (tito), Alexander Taylor (inclement) and Andre Miras (AndreMiras)

From left to right the attendees are Peter Badida (KeyWeeUsr), Gabriel Pettier (tshirtman), Mathieu Virbel (tito), Alexander Taylor (inclement) and Andre Miras (AndreMiras).

We used this opportunity to make amazing progress on a range of Kivy issues. Most especially:

  • 55 closed issues and 36 merged pull requests across all Kivy projects, specifically targeting long standing bugs and the most important current issues.
  • A full update of buildozer to work well with the latest SDK, NDK and other dependencies for Android development. New release to follow!
  • Rapid progress on ncis, a new remote inspector/debugger for all types of Python application.
  • Many improvements to the python-for-android continuous integration, and some major bugfixes for stability with Python 3 and the latest toolchain. Preliminary 0.7.0 release already available via PyPI and buildozer, more to follow.
  • Extensive cleanup and improvements for PyJNIus.
  • A further ~170 closed python-for-android issues and ~110 buildozer issues, as a general clean up of stale and outdated reports to focus on the ones that really matter.

For the next two days, the same team will be attending FOSDEM 2019. Let us know by discord or other communication if you’d like to say hello!

Cached and templated files in python-for-android builds

I’ve more than once seen people confused by how python-for-android constructs an Android project that can be compiled into an APK. Since p4a uses various cached and templated files, it’s easy to get confused trying to edit things only to find your changes are overwritten when you run p4a again.

Here’s a quick summary of what’s what.

Bootstraps

The core project files are all in the bootstraps directory. A bootstrap is basically an Android project, containing java sources, JNI stuff to be compiled, and project management files like the AndroidManifest.xml and build.gradle.

Note: Some of these files are built from templates, e.g. in the main SDL2 bootstrap you can find build.tmpl.gradle, AndroidManifest.tmpl.xml etc. in the templates subdirectory.

If you edit the code in these bootstrap directories, the changes will always take effect if you rebuild your whole project, but might not affect anything if you repeat a previous build. This is due to caching of previous build components. You can always guarantee that everything is cleared to be rebuilt using p4a clean dists builds (or there are other tricks if you look into it).

Build directories

Most of the individual python-for-android recipes are built in separate build directories. The location of these depends on the OS: on Linux the default is ~/.local/share/python-for-android, especially ~/.local/share/python-for-android/other_builds. When you build a recipe, it is copied here for the build to be run. These folders also cache builds, so if you e.g. build two different projects using python3 then the same build directory is used both times, reducing time spent compiling.

You can edit code in ~/.local/share/python-for-android/other_builds, but it isn’t recommended unless you have a good idea what python-for-android will overwrite or cache on each run. It is, however, sometimes useful during development.

Dists

Dists are p4a’s fully compiled Android projects, including the bundled output of all the different requirements specified by the user. On Linux, their default location is ~/.local/share/python-for-android/dists.

Every time you build an APK using p4a apk ..., this essentially runs gradle from an appropriate dist directory (i.e. the one with the recipes you wanted). At this point, nothing new is built or copied from the build directories, so changes you make to p4a’s recipes or build directories have no effect on the output. However, templated files such as AndroidManifest.tmpl.xml are rebuilt every time. That means that you must edit the templates themselves if you want your changes to make it to the APK.

You can always run p4a clean dists to delete the existing Android projects. Next time you run p4a apk ..., a new dist will be created.

Buildozer

When using buildozer, everything works basically the same except that the build and dist directories can be found in $PROJECT_DIR/.buildozer/android/platform/build instead of ~/.local/share/python-for-android. The python-for-android source code is stored in $PROJECT_DIR/.buildozer/android/platform/python-for-android.

Cached and templated files in python-for-android builds

I’ve more than once seen people confused by how python-for-android constructs an Android project that can be compiled into an APK. Since p4a uses various cached and templated files, it’s easy to get confused trying to edit things only to find your changes are overwritten when you run p4a again.

Here’s a quick summary of what’s what.

Bootstraps

The core project files are all in the bootstraps directory. A bootstrap is basically an Android project, containing java sources, JNI stuff to be compiled, and project management files like the AndroidManifest.xml and build.gradle.

Note: Some of these files are built from templates, e.g. in the main SDL2 bootstrap you can find build.tmpl.gradle, AndroidManifest.tmpl.xml etc. in the templates subdirectory.

If you edit the code in these bootstrap directories, the changes will always take effect if you rebuild your whole project, but might not affect anything if you repeat a previous build. This is due to caching of previous build components. You can always guarantee that everything is cleared to be rebuilt using p4a clean dists builds (or there are other tricks if you look into it).

Build directories

Most of the individual python-for-android recipes are built in separate build directories. The location of these depends on the OS: on Linux the default is ~/.local/share/python-for-android, especially ~/.local/share/python-for-android/other_builds. When you build a recipe, it is copied here for the build to be run. These folders also cache builds, so if you e.g. build two different projects using python3 then the same build directory is used both times, reducing time spent compiling.

You can edit code in ~/.local/share/python-for-android/other_builds, but it isn’t recommended unless you have a good idea what python-for-android will overwrite or cache on each run. It is, however, sometimes useful during development.

Dists

Dists are p4a’s fully compiled Android projects, including the bundled output of all the different requirements specified by the user. On Linux, their default location is ~/.local/share/python-for-android/dists.

Every time you build an APK using p4a apk ..., this essentially runs gradle from an appropriate dist directory (i.e. the one with the recipes you wanted). At this point, nothing new is built or copied from the build directories, so changes you make to p4a’s recipes or build directories have no effect on the output. However, templated files such as AndroidManifest.tmpl.xml are rebuilt every time. That means that you must edit the templates themselves if you want your changes to make it to the APK.

You can always run p4a clean dists to delete the existing Android projects. Next time you run p4a apk ..., a new dist will be created.

Buildozer

When using buildozer, everything works basically the same except that the build and dist directories can be found in $PROJECT_DIR/.buildozer/android/platform/build instead of ~/.local/share/python-for-android. The python-for-android source code is stored in $PROJECT_DIR/.buildozer/android/platform/python-for-android.

python-for-android 0.6 released

We’ve just officially released python-for-android 0.6. The new version can be downloaded via pip, or will be used by buildozer automatically in new installations. This release contains about 130 new commits from 14 different contributors. Thanks to everyone involved!

python-for-android is a packaging tool for turning Python scripts and apps into Android APKs. It was originally created for use with the Kivy graphical framework, but now supports multiple kinds of Python app including Kivy, PySDL2, a webview interface with Flask or other webserver backend, plain Python scripts without a GUI, or other possibilities such as Python builds for use in other applications.

As planned following the release of python-for-android 0.5, the new version includes some relatively major changes and improvements. In particular, python-for-android should now work with all recent versions of the Android SDK and NDK. On the SDK side this means python-for-android now uses gradle if available, although this doesn’t require any changes to the configuration on the user side.

For the next release I intend to focus work on checking and updating python-for-android’s build recipes to make sure they are all properly compatible with one another and with different build configurations. I’d also like to improve our automated testing, in order to more easily detect and fix issues as they appear.

For full instructions and further information, see the python-for-android documentation.

python-for-android 0.6 released

We’ve just officially released python-for-android 0.6. The new version can be downloaded via pip, or will be used by buildozer automatically in new installations. This release contains about 130 new commits from 14 different contributors. Thanks to everyone involved!

python-for-android is a packaging tool for turning Python scripts and apps into Android APKs. It was originally created for use with the Kivy graphical framework, but now supports multiple kinds of Python app including Kivy, PySDL2, a webview interface with Flask or other webserver backend, plain Python scripts without a GUI, or other possibilities such as Python builds for use in other applications.

As planned following the release of python-for-android 0.5, the new version includes some relatively major changes and improvements. In particular, python-for-android should now work with all recent versions of the Android SDK and NDK. On the SDK side this means python-for-android now uses gradle if available, although this doesn’t require any changes to the configuration on the user side.

For full instructions and further information, see the python-for-android documentation.

python-for-android 0.5 released

We’ve just officially released python-for-android 0.5. The new version can be downloaded via pip, or will be used by buildozer automatically in new installations. This release contains about 300 commits from almost 40 different contributors. Thanks to everyone involved!

python-for-android is a packaging tool for turning Python scripts and apps into Android APKs. It was originally created for use with the Kivy graphical framework, but now supports multiple kinds of Python app including Kivy, PySDL2, a webview interface with Flask or other webserver backend, plain Python scripts without a GUI, or other possibilities such as Python builds for use in other applications.

This release contains many fixes and improvements to all parts of the toolchain. Now that these have been released as stable, we intend to move quickly to make some larger improvements including supporting gradle builds, and better support for Python 3 in some recipes.

For full instructions and further information, see the python-for-android documentation.