If you want to give a little life to interactive (or not) elements, it’s always
nice to have more tricks to manipulate images for nifty effects.
One of such ways is mapping a Texture on a special canvas instruction, that
will distort your texture based on the position of its points.
[kivy.graphics.Mesh](http://kivy.org/docs/api-kivy.graphics.html#kivy.graphics.Mesh)
is such an instruction, and it has a simple interface, if
not 100% straightforward, you basically call it this way.
Mesh:
vertices: (x1, y1, s1, v1, x2, y2, s2, v2, x3, y3, s3, v3...)
indices: (1, 2, 3...)
texture: some_texture
mode: some_mode
where all:
x mean the horizontal coordinate of a point
y mean the vertical coordinate of a point
s mean the horizontal position of the texture attached to this point (between 0
and 1)
v mean the vertical position of the texture attached to this point (between 0
and 1)
indices is useful if, for some (very good) reason, you don’t want to give the
points in the order you’ll use them, or if you want to refer to a point
multiple time (this won’t be demonstrated in this blog post, but try to think
about a grid mapping, for example), now we will use it in the most simple way,
just give the range of your number of points.
the texture needs to be a texture object, you can get such an object by getting
the texture property of a
[CoreImage](http://kivy.org/docs/api-kivy.core.image.html#kivy.core.image.Image)
or an Image (or even a Label, if you want to).
Let’s say we have an image, for example, kivy logo.
from kivy.core.image import Image as CoreImage

texture = CoreImage('data/logo/kivy-icon-512.png').texture
(this will work wherever you are, because kivy look at his images anyway :))
This image is a circle, lets use that to cut it into a virtual pie and assign a
part of the texture to each part, we’ll be using the triangle_fan mode of
Mesh, that is a perfect fit for such an operation.
# the central point
points = [Window.width / 2, Window.height / 2, .5, .5]

# now go around
    i = 0
    while i < 2 * pi:
        i += 0.01 * pi
        points.extend([
    Window.width / 2 + cos(i) * 100,
    Window.height / 2 + sin(i) * 100,
    .5 + sin(i),
    .5 + cos(i)])
put that in a more complete program, and you get this:
from kivy.app import App
from kivy.lang import Builder
from kivy.core.image import Image as CoreImage
from kivy.properties import ListProperty, ObjectProperty
from kivy.clock import Clock
from kivy.core.window import Window
from math import sin, cos, pi


kv = '''
Widget:
    canvas:
        Color:
            rgba: 1, 1, 1, 1
        Mesh:
            vertices: app.mesh_points
            indices: range(len(app.mesh_points) / 4)
            texture: app.mesh_texture
            mode: 'triangle_fan'
'''


class MeshBallApp(App):
    mesh_points = ListProperty([])
    mesh_texture = ObjectProperty(None)

    def build(self):
        self.mesh_texture = CoreImage('data/logo/kivy-icon-512.png').texture
        Clock.schedule_interval(self.update_points, 0)
        return Builder.load_string(kv)

    def update_points(self, *args):
        points = [Window.width / 2, Window.height / 2, .5, .5]
        i = 0
        while i < 2 * pi:
            i += 0.01 * pi
            points.extend([
                Window.width / 2 + cos(i) * 100,
                Window.height / 2 + sin(i) * 100,
                .5 + cos(i),
                .5 + sin(i)])

        self.mesh_points = points

if __name__ == '__main__':
    MeshBallApp().run()
Now, this is not very impressive, we just have an image, there were much
simpler ways to do that!
But now, we can tweek the rendering a lot, lets add some offseting of the
texture, some radius change, and some wobbling, with sliders to control all
this.
from kivy.app import App
from kivy.lang import Builder
from kivy.core.image import Image as CoreImage
from kivy.properties import ListProperty, ObjectProperty, NumericProperty
from kivy.clock import Clock
from kivy.core.window import Window
from math import sin, cos, pi


kv = '''
BoxLayout:
    Widget:
        canvas:
            Color:
                rgba: 1, 1, 1, 1
            Mesh:
                vertices: app.mesh_points
                indices: range(len(app.mesh_points) / 4)
                texture: app.mesh_texture
                mode: 'triangle_fan'
    BoxLayout:
        orientation: 'vertical'
        size_hint_x: None
        width: 100
        Slider:
            value: app.offset_x
            on_value: app.offset_x = args[1]
            min: -1
            max: 1
        Slider:
            value: app.offset_y
            on_value: app.offset_y = args[1]
            min: -1
            max: 1
        Slider:
            value: app.radius
            on_value: app.radius = args[1]
            min: 10
            max: 1000
        Slider:
            value: app.sin_wobble
            on_value: app.sin_wobble = args[1]
            min: -50
            max: 50
        Slider:
            value: app.sin_wobble_speed
            on_value: app.sin_wobble_speed = args[1]
            min: 0
            max: 50
            step: 1
'''


class MeshBallApp(App):
    mesh_points = ListProperty([])
    mesh_texture = ObjectProperty(None)
    radius = NumericProperty(500)
    offset_x = NumericProperty(.5)
    offset_y = NumericProperty(.5)
    sin_wobble = NumericProperty(0)
    sin_wobble_speed = NumericProperty(0)

    def build(self):
        self.mesh_texture = CoreImage('data/logo/kivy-icon-512.png').texture
        Clock.schedule_interval(self.update_points, 0)
        return Builder.load_string(kv)

    def update_points(self, *args):
        points = [Window.width / 2, Window.height / 2, .5, .5]
        i = 0
        while i < 2 * pi:
            i += 0.01 * pi
            points.extend([
                Window.width / 2 + cos(i) * (self.radius + self.sin_wobble * sin(i * self.sin_wobble_speed)),
                Window.height / 2 + sin(i) * (self.radius + self.sin_wobble * sin(i * self.sin_wobble_speed)),
                self.offset_x + sin(i),
                self.offset_y + cos(i)])

        self.mesh_points = points

if __name__ == '__main__':
    MeshBallApp().run()
which gives us:
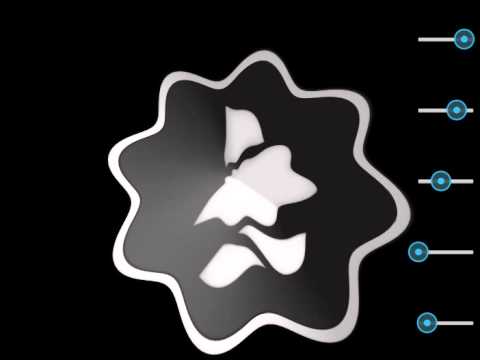
Now we are talking!