Using AI for refactoring Vue 2 to Vue 3

2022 has been an incredible year for AI-generated content. I see that as a tool, the same way you listen to music and create music afterwards. The same way my developer journey has been from reading open-source code, and contributing to the field.

I have a project made with Vue 2 using Typescript, Vue Property Decorator and Quasar. My goal was to refactor to Vue 3 using Typescript with Composition API. My time is limited on the subject and not a big priority, and the amount of work seems too much for my bare hand that, 2 years ago, that i dropped it.

We are in 2023, could AI help me for a such task ?

TDLR

Gist: https://gist.github.com/tito/230863f714ab43fc92ad55510de2ca4e

The test case

Here is my “test” source, where I’ll experiment the refactoring. The actual file is actually longer as it include template and style tag, but it doesn’t matter for our example.

<script lang="ts">
import { Component, Prop, Vue, Watch } from 'vue-property-decorator';

@Component
export default class Login extends Vue {
 public $store: any;
 public $q: any;
 public $route: any;
 public loading: boolean = false;
 public error: any = null;
 public email: string = '';
 public password: string = '';

 public async created() {
 const msgkey = this.$route.params.msg;
 if (msgkey === 'LOGOUT_SUCCESS') {
 this.$q.notify('Vous êtes déconnecté');
 }
 if (this.$route.query.email !== undefined) {
 this.email = this.$route.query.email;
 }
 }

 public handleSubmit() {
 this.error = null;
 if (this.password.length > 0) {
 this.loading = true;
 this.$store.dispatch('login', {
 email: this.email,
 password: this.password,
 }).catch((error: any) => {
 this.error = 'Email ou mot de passe invalide';
 this.loading = false;
 });
 }
 }
}
</script>

Copilot

I use copilot day-to-day as my advanced auto completion. While i don’t use it for creating a new file from scratch, it is a very handy tool for auto completion for repetitive tasks, from variable declarations, object copying, filter/map…

But that’s all it is. I cannot really take a whole file, and give instruction to copilot for converting from one syntax to another…

ChatGPT

Using OpenAI ChatGPT API, i got a prompt that fairly give me the output i wanted.

You are an assistant design to help developper for migrating their code from Vue 2 to Vue 3 using Typescript with Composition API. Here is a set of rules you must absolutely follow:

1. Rewrite the <script lang="ts"> to <script setup lang="ts">
2. The content of the script tag must be a valid Typescript code
3. The component must be flattened into the script setup
4. Remove any "export default".
5. Use the `onMounted` hook instead of the `created` lifecycle hook if necessary
6. Use the `useRoute` approach instead of $route. Same for $router.
7. Store is not using vuex but pinia.
8. Auth related function is accessible in stores/auth.ts, using useAuthStore.
9. Do not use Ref is the type can be infered from the value pass into ref()
10. Do not put all the methods and properties into a global const object
11. Prefer using global "const router = useRouter()" instead of live instanciation when needed

My problem is, result are not consistent, and do follow my rules.

First generation

Not as perfect as wanted. It choose to not use onMounted(), and flattened the code, which is allowed by the instruction. However, this.$q is here, which end up failing.

<script setup lang="ts">
import { useRouter } from 'vue-router';
import { useAuthStore } from '@/stores/auth';
import { ref } from 'vue';

const router = useRouter();
const authStore = useAuthStore();

const loading = ref(false);
const error = ref(null);
const email = ref('');
const password = ref('');

const handleSubmit = () => {
 error.value = null;
 if (password.value.length > 0) {
 loading.value = true;
 authStore.login({ email: email.value, password: password.value})
 .catch((error: any) => {
 error.value = 'Email ou mot de passe invalide';
 loading.value = false;
 });
 }
};

const msgkey = router.params.msg;
if (msgkey === 'LOGOUT_SUCCESS') {
 this.$q.notify('Vous êtes déconnecté');
}
if (router.query.email !== undefined) {
 email.value = router.query.email as string;
}

</script>

Second generation

That’s what bother me. By giving the same input, i have a now a different output. It recognized Quasar, and put the code into the onMounted(). Works for me. BUT, now the login function don’t have the same input as before, it decided to flatten the argument. OK.

<script setup lang="ts">
import { useRoute } from 'vue-router';
import { onMounted, ref } from 'vue';
import { useQuasar } from 'quasar';
import { useAuthStore } from '@/stores/auth';

const loading = ref(false);
const error = ref(null);
const email = ref('');
const password = ref('');

const { notify } = useQuasar();
const route = useRoute();
const authStore = useAuthStore();

onMounted(() => {
 const msgkey = route.params.msg;
 if (msgkey === 'LOGOUT_SUCCESS') {
 notify('Vous êtes déconnecté');
 }
 if (route.query.email !== undefined) {
 email.value = route.query.email as string;
 }
});

const handleSubmit = () => {
 error.value = null;
 if (password.value.length > 0) {
 loading.value = true;
 authStore.login(email.value, password.value)
 .catch((error: any) => {
 error.value = 'Email ou mot de passe invalide';
 loading.value = false;
 });
 }
};
</script>

When it went wrong

I tried to play with temperature, top_n, but from time to time, it generate something against the rules.

<script setup lang="ts">
...
const Login = () => {
 const store = useAuthStore();
 const router = useRouter();
 const loading = ref(false);
 const error = ref(null);
 const email = ref('');
 const password = ref('');

 onMounted(() => {
 ...
 });

 const handleSubmit = () => {
 ...
 }

 return {
 loading,
 error,
 email,
 password,
 handleSubmit
 }
}
</script>
<script setup lang="ts">
...
export default defineComponent({
 components: {
 GaugeChart,
 },
 setup() {
 const id = ref<number>();
 const loading = ref(false);
 const mapZoom = 8;
 const resources = ref([]);
...

Conclusion

I can go again and give another set of rules to use for the migration, especially moving from a single store using Vuex to many stores using Pinia.

Out of 92 files needed to convert, totally over 22997 lines to convert, around 10 needed a refactoring by hand as i was not able to generate a correct approach. Nevertheless, it was much faster to go other it with the tool and review rather than manually pass through everything.

For today, i take that as a win.
Kivy Programming Contest 2014

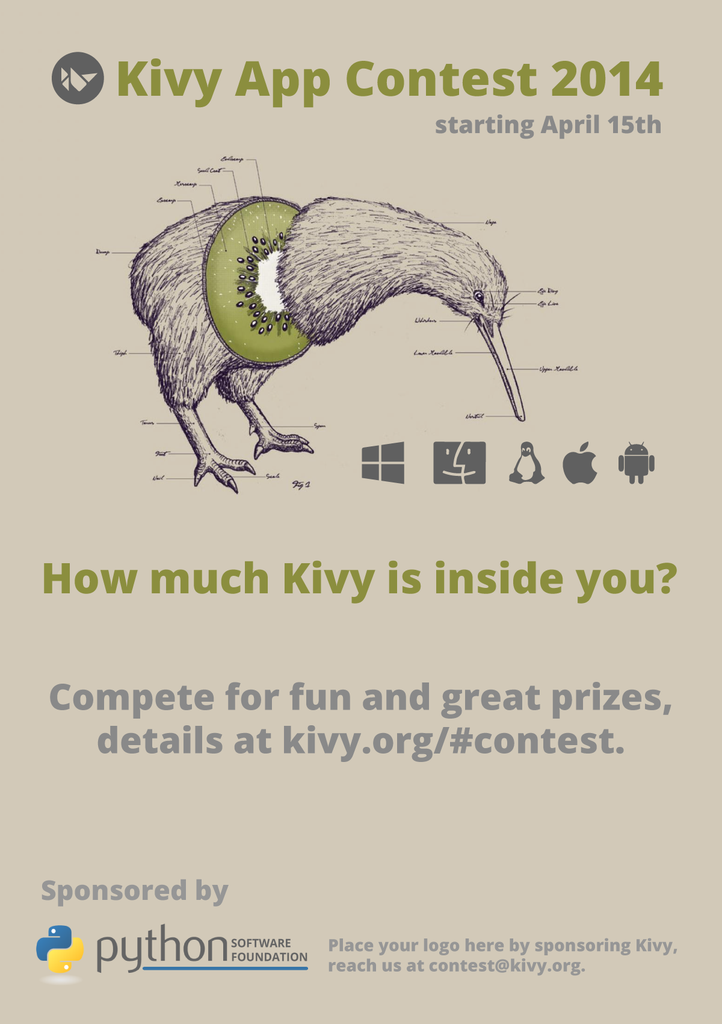
Kivy is organizing its second application development contest!. This is a great chance for users both new and experienced to show off their skills and compete for prizes. Entries will be judged on a range of criteria accessible to both new and experienced programmers, so don’t be afraid to dive in!

poster_1

A big big thanks to the Python Software Foundation for being our first and lovely sponsor :)

2048, in Python / Kivy

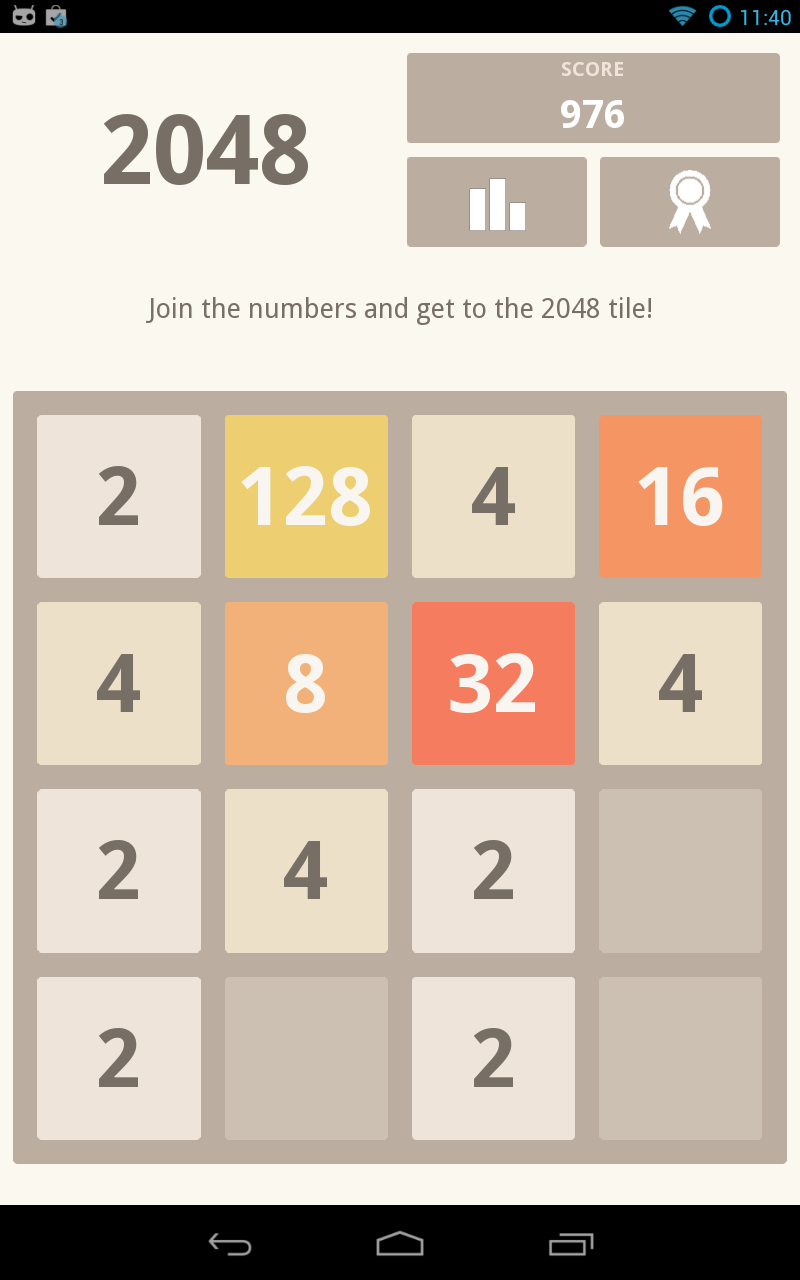
If you don’t know the 2048 puzzle yet, you should. But be careful, it’s time consuming. I won’t go on the whole clone history of the game, but will just say that if you want to play it on the Web, play to the Gabriel Cirulli 2048. The author said it wont make an official iOS/Android app, so… let’s give Kivy a try :)

device-2014-03-15-114048

Only 2 hours of coding where needed for the first published version of the game. Then i learned on the Google Play Game services APIs for integrating a leaderboard and achievements. And after a couple of hours during the night, what i can say is: Be patient! Even if you follow the documentation carefully, you need to wait few hours before your app_id works on their server, even in test mode. There never warn us about it.

When the setup is done and it start working, it is easy to login:

 PythonActivity = autoclass('org.renpy.android.PythonActivity')
 GameHelper = autoclass('com.google.example.games.basegameutils.GameHelper')

 gh_instance = GameHelper(PythonActivity.mActivity, GameHelper.CLIENT_ALL)
 gh_instance_listener = GameHelperListener()
 gh_instance.setup(gh_instance_listener)
 gh_instance.onStart(PythonActivity.mActivity)
 android.activity.unbind(on_activity_result=_on_activity_result)
 android.activity.bind(on_activity_result=_on_activity_result)

That’s how you can unlock achievement:

# uid is the Google UID for the achievement you want
if gh_instance.isSignedIn():
 Games.Achievements.unlock(gh_instance.getApiClient(), uid)

And put the user score on the leaderboard:

# uid is the Google UID for the leaderboard you've created.
# You can have multiple leaderboard.
if gh_instance.isSignedIn():
 Games.Leaderboards.submitScore(gh_instance.getApiClient(), uid, score)

There is a little more code around that, but globally, using the new Play Games services APIs is now easy. I hope this little piece of code will help peoples to integrate it into their app. Somebody need to start a Python library for managing Google Play API and Game Center for iOS.

Have a look at the source code for an example of the integration with the Play Games services APIs :)

Get it on Google Play

Using Facebook SDK with Python-for-Android / Kivy

For another museum project, Arnaud asked me to see if we could integrate Facebook in an app on Android. The usual libraries are made for desktop, and manually open a webbrowser to handle the user authorization. But that’s not really nice for us, it would be nicer to have a native integration instead. Let’s see how we can use the official Facebook Android SDK.

Prerequisites

You’ll need to have:

Get the example

Clone the Kivy/Facebook example:

$ git clone https://github.com/tito/p4a-facebook-example

Register a Facebook application

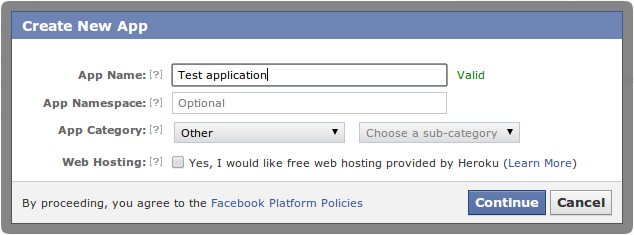
  1. Go to the Facebook developers interface

  2. Click on Sélection_107

  3. Fill the information “App Name”. Don’t put “FB” or “Facebook” in the title, or your application name will be considered as Invalid :) Sélection_108

  4. Pass the captcha

  5. Write down your application id somewhereSélection_111

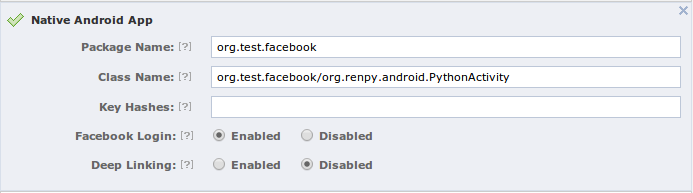
  6. Now, you need to activate Native Android App. The package name is the same name as the one we will pass in --package when building the APK. The Class Name is the packagename/activity. Activity class is always the same for all the applications compiled with python-for-android. Sélection_109

  7. Right now, the Facebook Android SDK will not authorize our android application to be used, because Facebook want to know the signature hash that will be used by our generated APK. To generate the key hashes, you need to use the keytool. Here is an example for the android “debug” key:

    $ keytool -exportcert -alias androiddebugkey \
     -keystore ~/.android/debug.keystore | \
     openssl sha1 -binary | openssl base64
    Enter keystore password: android
    u+bzQmG87L298C4KGM8yODi3W/4=
    

    Copy the generated key hash, and paste it to the field:

    Sélection_110

  8. Setup the our application

  9. Go into p4a-facebook-example, and edit the main.py

  10. Search for FACEBOOK_APP_ID, and replace with your own Application Id

  11. Go into python-for-android, and create a distribution:

    $ ./distribute.sh -m 'kivy'
    
  12. Go into the dist/default

  13. Generate the APK one time (for generating all the file we need to customize). Replace /path/to/p4a-facebook-example:

    ./build.py --name "Facebook test" --package org.test.facebook \
     --version 1 --private /path/to/p4a-facebook-example/ \
     --window --permission INTERNET debug
    
  14. Add a new reference to project.properties to include the Facebook SDK. The path to the Facebook SDK MUST be a relative path, otherwise you’ll get issues during the next build.

    android.library.reference.1=../../facebook-android-sdk-3.0.2/facebook
    
  15. Edit the templates/AndroidManifest.tmpl.xml to include the Facebook login activity, just under the <application>:

  16. Rebuild your application… and you’re ready to test :)

  17. Install the application on your device:

    adb install -r bin/Facebooktest-1-debug.apk
    

Test your application

The Facebook SDK 3.0 require to separate read and publish permissions. To the user, it means you’ll have 2 dialog to accept. Even if you just want to publish to the application stream, you need to have the basic permission (read) accepted by the user before publish permissions. This is already implemented in the example app.

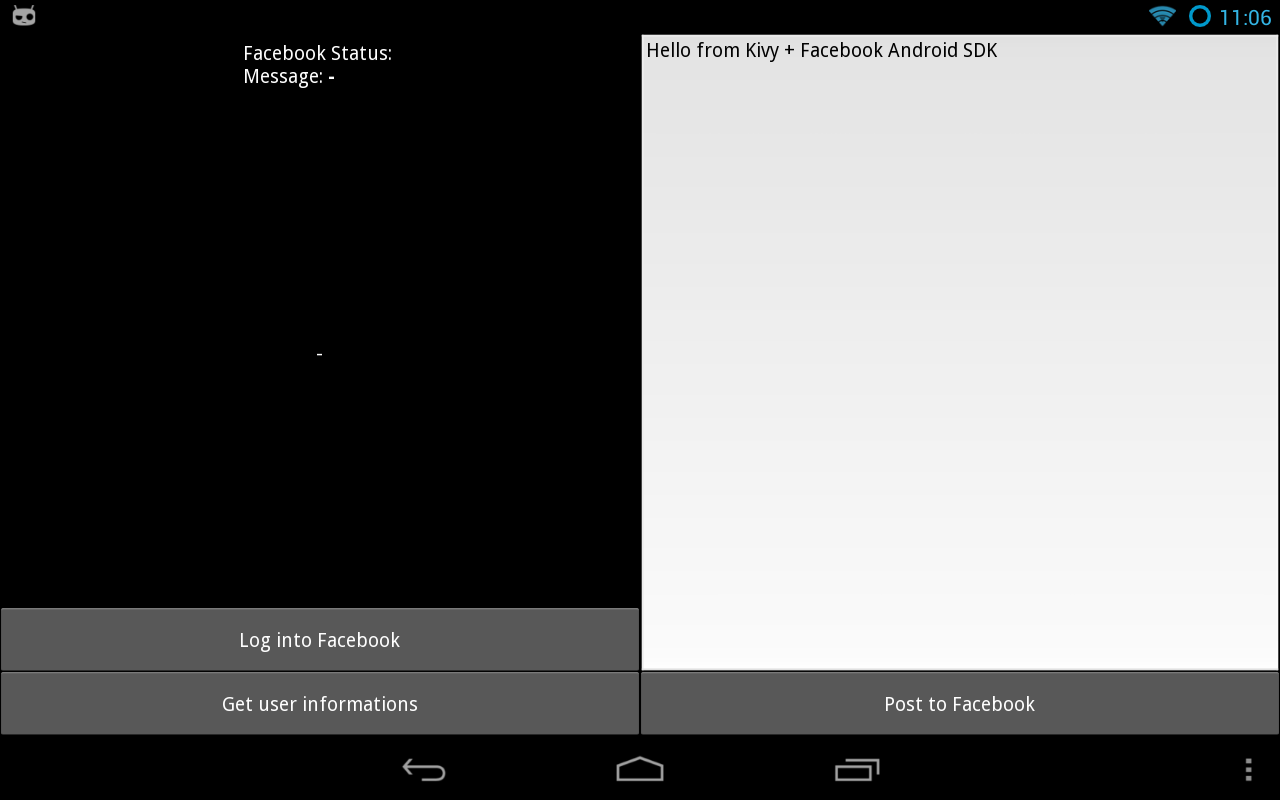
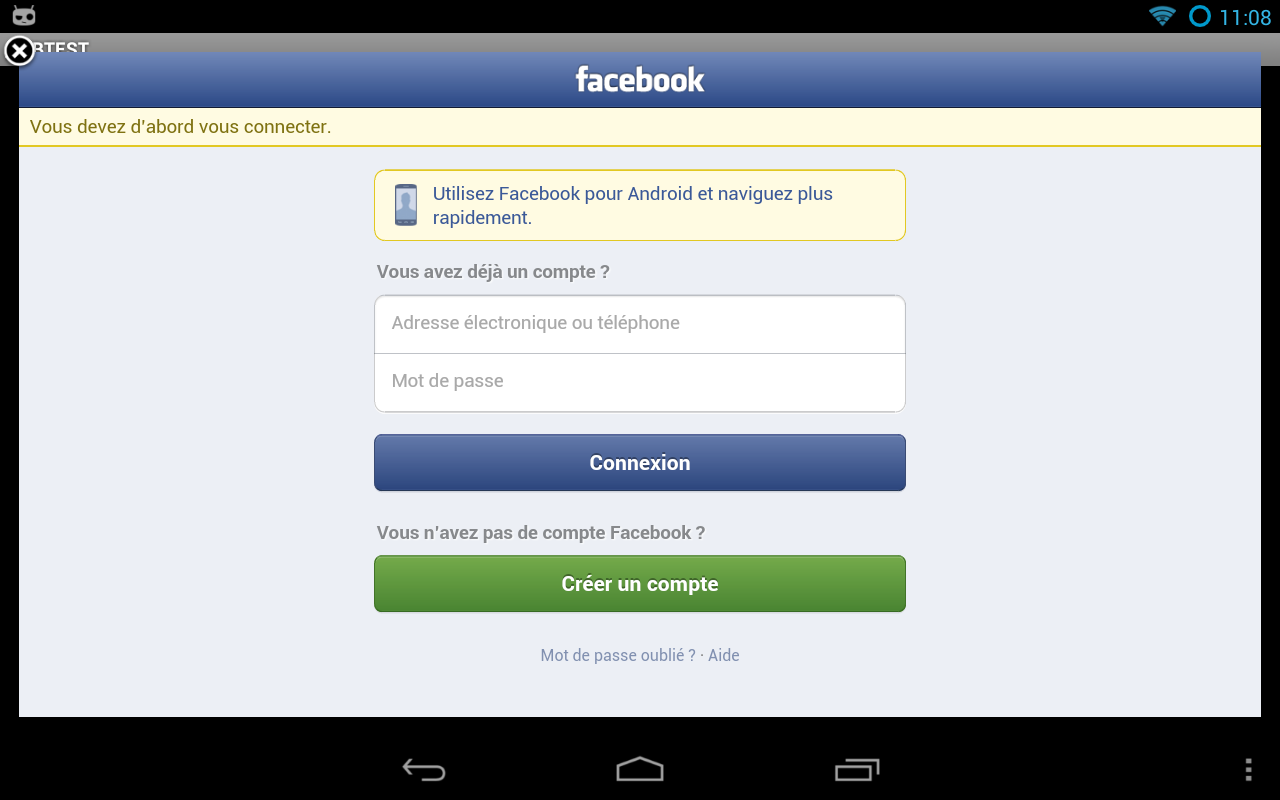
When you start the application the first time, you’ll have:

device-2013-08-08-110647

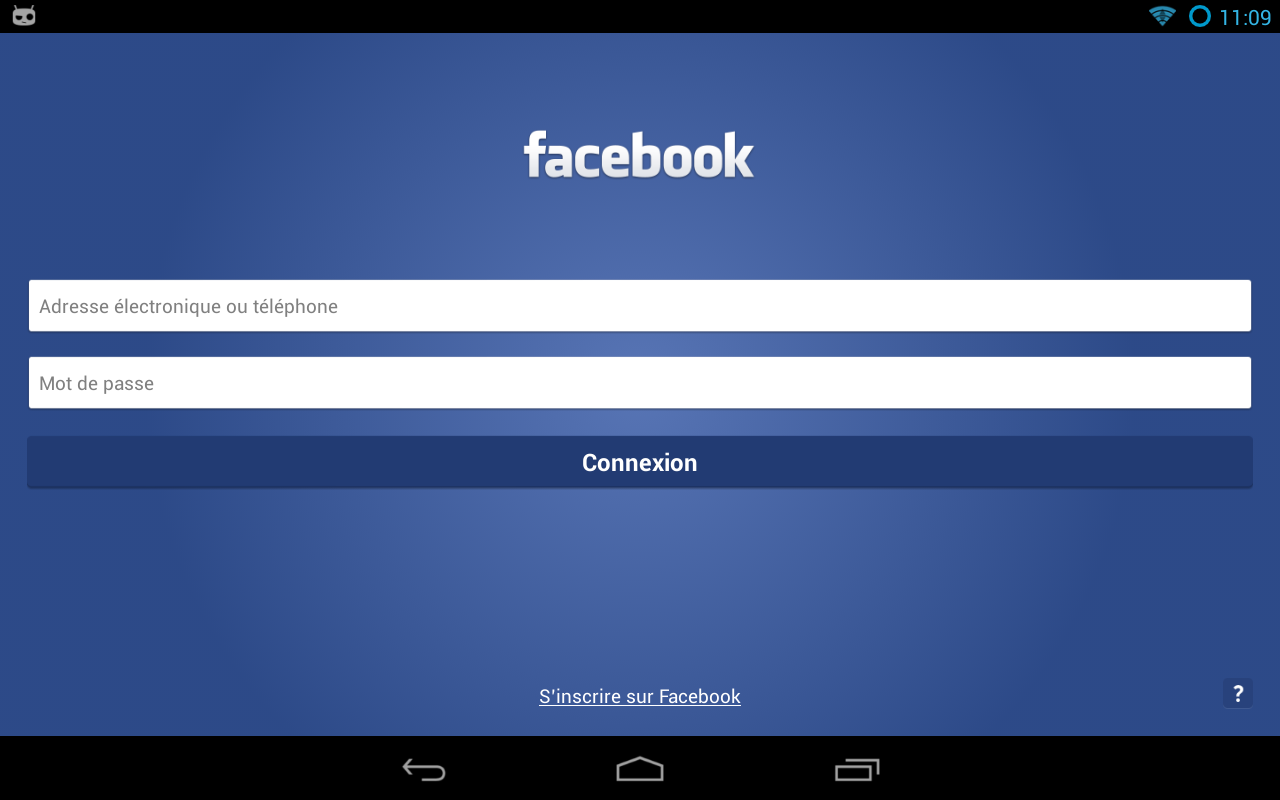
Depending if you have the Native Facebook application or not, you’ll have 2 kinds of authentification boxes.

device-2013-08-08-110834

Without Facebook installed on the device:

And with Facebook installed on the device:

device-2013-08-08-111002

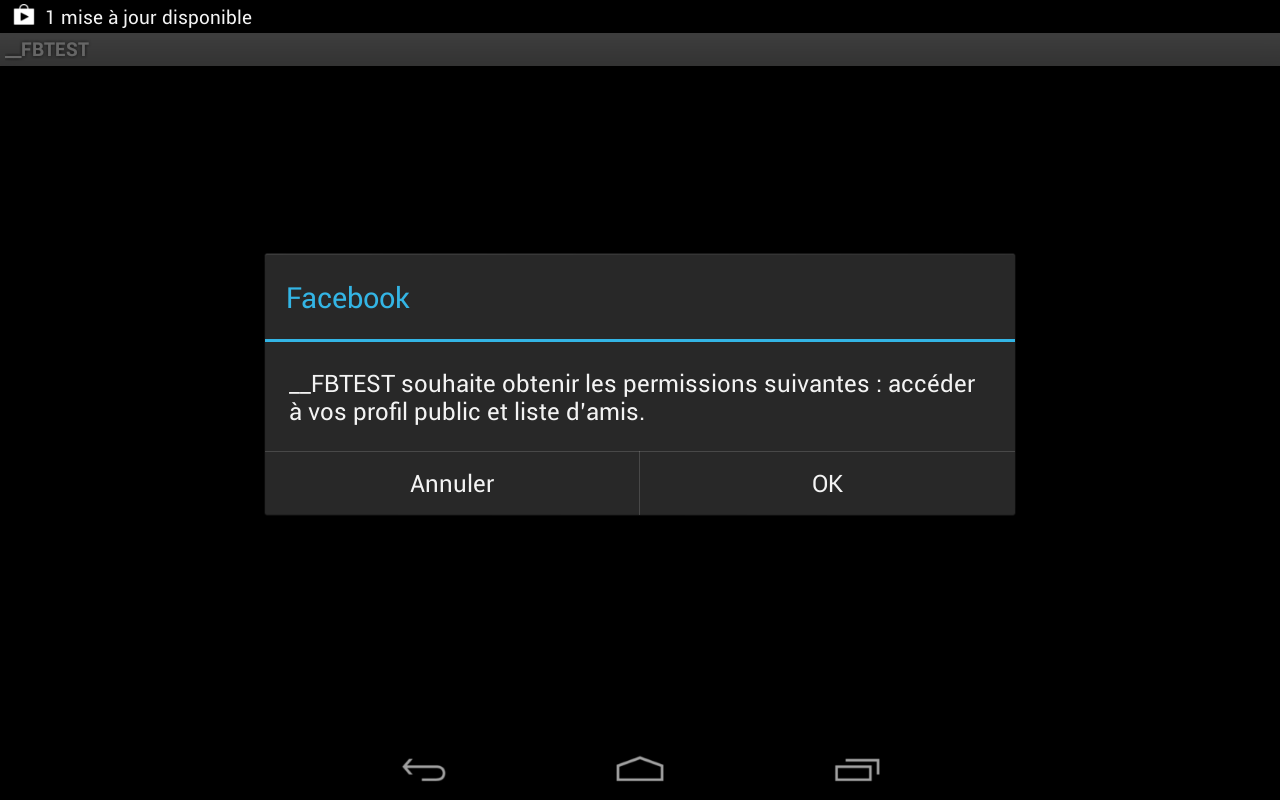
After authentication, the user will need to accept our permissions:

device-2013-08-08-111111

It’s done!

The application have now the right to post :) The example post in the user stream as the application itself, not as the user. It’s called “publish_actions”.

Getting further

Obviously, when you use the Facebook SDK itself, you feel the pain of an API designed for Java. For every callback that Facebook want to call, you need to implement a Java class and define the callback method. Python is really simpler and fun to use.

See for yourself: we want to make a call of “[Request.newStatusUpdateRequest](https://developers.facebook.com/docs/reference/android/current/Request#newStatusUpdateRequest(Session, String, Callback))”. Se weed first to implement a GraphUserCallback class, in Java. Thanks to Pyjnius, we can do it directly in Python:

class _FacebookGraphUserCallback(PythonJavaClass):

 __javainterfaces__ = ['com.facebook.Request$GraphUserCallback']
 __javacontext__ = 'app'

 def __init__(self, callback):
 self.callback = callback
 super(_FacebookGraphUserCallback, self).__init__()

 @java_method('(Lcom/facebook/model/GraphUser;Lcom/facebook/Response;)V')
 def onCompleted(self, user, response):
 self.callback(user, response)

This Python/Java class will call our own python callback when the Java callback onCompleted will be called. Then:

@run_on_ui_thread
def post(self, text, callback):
 req = Request.newStatusUpdateRequest(
 self._session, text, _FacebookRequestCallback(callback))
 req.executeAsync()

All you have to do at the end, is to call the post method:

def fb_post(self, text):
 def callback(*args):
 from time import time
 self.post_status = 'message posted at {}'.format(time())
 self.facebook.post(text, callback=callback)

I don’t provide a wrapper around all the possible Request method you can do with Facebook. I just have an example for “post” and “me”. Both wrap “[Request.newStatusUpdateRequest](https://developers.facebook.com/docs/reference/android/current/Request#newStatusUpdateRequest(Session, String, Callback))” and “[Request.newMeRequest](https://developers.facebook.com/docs/reference/android/current/Request#newMeRequest(Session, GraphUserCallback))”. Please note that every request call must happen in the UI thread. Use the python-for-android/runnable module for that, with @run_on_ui_thread decorator.

The end

It was not easy to get it right, and it still complex to make all the pieces together. I’ve tried to use their own LoginButton (because they said that’s how they want it, everywhere), but i’ve not be able to use it in our app. Mostly because the LoginButton is a pure android widget, and because it doesn’t want to bring back the Activity after login. I was stuck too much time on it, and preferred to go in another way. Please note that you should not share an application with a fake Facebook button, the design / look-and-feel must be the same as the original one.

I hope that will help some of you to get started !

Kivy 1.7.0 is out

If you missed it, Kivy 1.7.0 is out last Monday. It’s quite a big release that include some big fixes we did during the :

  • Android Emulator is now supported
  • ScrollView has been re-factored with new physics calculations. To be exact, the scrollview doesn’t calculate anything now, it just pass the touch position to an Scroll effect. This class calculate the movement’s velocity, and the over-scroll’s distance (means how far you scrolled out of the bounds). Then, we implemented 2 visual effects that use the over-scroll to make the scrollview act as a [Damped spring, and/or to fade out the scrollview if you over-scroll too much.](http://kivy.org/docs/api-kivy.effects.dampedscroll.html)
  • Garden: a separated organization for centralize user’s widgets and addons. You can create garden packages very easily, and import it in the source code with just “kivy.garden.packagename”. Few garden packages are already available!
  • And more, Check the announcement :)

Pyjnius: Accessing Java classes from Python

We’re pleased to announce the Pyjnius project. It’s a Python library to access Java classes from Python, on the desktop or on Android.

We found others libraries such as JPype or Py4j, but we weren’t happy with the design and the usability. Using Jython wasn’t an option either, because we wanted to use the library within our python for android project.

Let me show you how simple it is to use Pyjnius:

>>> from jnius import autoclass
>>> Stack = autoclass('java.util.Stack')
>>> stack = Stack()
>>> stack.push('hello')
>>> stack.push('world')
>>> stack.pop()
'world'
>>> stack.pop()
'hello'

What we demonstrate here is the autoclass function that create kind-of proxy that reflect all the methods and fields available from the Java class java.util.Stack.

Ok, maybe you want an Android-related example? Just have a look:

from jnius import autoclass
from time import sleep

MediaRecorder = autoclass('android.media.MediaRecorder')
AudioSource = autoclass('android.media.MediaRecorder$AudioSource')
OutputFormat = autoclass('android.media.MediaRecorder$OutputFormat')
AudioEncoder = autoclass('android.media.MediaRecorder$AudioEncoder')

# Record the Microphone with a 3GP recorder
mRecorder = MediaRecorder()
mRecorder.setAudioSource(AudioSource.MIC)
mRecorder.setOutputFormat(OutputFormat.THREE_GPP)
mRecorder.setOutputFile('/sdcard/testrecorder.3gp')
mRecorder.setAudioEncoder(AudioEncoder.ARM_NB)
mRecorder.prepare()

# Record 5 seconds
mRecorder.start()
sleep(5)
mRecorder.stop()
mRecorder.release()

More examples are available in the documentation. We have a mapping between Java/Python type, native arrays, support for methods with multiple signatures, and a lot more. We are using Cython + JNI internally. The performance cost is minimal.

The library is already available for Python for android.

The library have been done by Gabriel Pettier and myself, under the Kivy organization.

IOS Support for Kivy

Kivy has now added official support for IOS platform. You can now package your Kivy application for the Ipad (and other iOS devices, testers needed).

The current instructions are available here: http://kivy.org/docs/guide/packaging-ios.html

For the full story on the multiple Apple limitations we are working with, i want to share the hardest part for Python integration: Apple’s prohibition on using dlopen() to load dynamic libraries. In a typical case, a compiled Python library’s extension is a “.so”, and the “.so” is dlopen() at import.

That being said, as we did for the python-for-android project published in January, we are redirecting the compilation object to create static libraries. Theses libraries are included in the final application binary. But it’s not enough: we must also tell to Python to look for the library entry point in the application binary, instead of dlopen(). So in the python dynload loader:

return (dl_funcptr) dlsym(RTLD_MAIN_ONLY, funcname)

This way, Python will always look at the application binary, and never need to use dlopen().

If you are worried that Apple would reject a Python-based application, or even using Kivy altogether, we have tested it for you: the game that won the Kivy contest has been packaged for IOS, submitted to Apple… and accepted. You can found Deflectouch on iTunes (source code).

Anyway, Kivy is now officially supporting 5 platforms: Windows, Linux, MacOSX, Android and IOS!

Enjoy :)

Kivy programming contest #1 is over!

During January, we hosted a contest for promoting the Kivy framework. The goal was simple: create a game using Kivy, without external non-pure python dependencies. All the entries have been submitted on our sponsor Github (and thanks to NotionInk), under a compatible OSS licence. The contest registered 21 entries, and 11 submissions was valid.

Our winners are:

  1. Deflectouch, from Cyril Stoller
  2. FishLife, from Zogg
  3. memoryKivy, from Niavlys
  4. Centripetal, from Dilon Cower
  5. Flingy, from Andy Wilson

In term of numbers, everything is growing:

  • 19919 unique visitors for the website (vs 9772 in December)
  • +56 subscribers on the mailing list (192 in total)
  • 229 messages on kivy-users (vs 94 in December)
  • 23 pull requests (vs 6 in December)

That was a great event so far, with a perfect timing: Kivy have now 1 year old! (first release was 1st February 2011).

Introducing “Python for Android”

I’m glad to share a new project called Python for Android. The goal of this project is to package your python application into an APK.

https://github.com/kivy/python-for-android

The project is under the umbrella of Kivy organization, but is not designed to be limited to Kivy only. Read the documentation to correctly install the NDK/SDK Android, and set the needed environment variables.

The packaging is done in 4 steps:

  1. Ensure you have Android SDK/NDK downloaded and correctly installed
  2. Ensure you have some environment set
  3. Create a Python distribution containing the selected modules
  4. Use that distribution to build an APK of your Python application

Creating the python distribution is as simple as that:

# create a simple distribution with python + PIL + Kivy
./distribute.sh -m "pil kivy"

# create a distribution with python + openssl + pil + kivy
./distribute.sh -m "openssl pil kivy"

A directory dist/default will be created, including the result of the whole arm compilation. Available libraries as for today: jpeg pil png sdl sqlite3 pygame kivy android libxml2 libxslt lxml ffmpeg openssl.

The second step is a little bit harder, since you need to provide more information for Android:

cd dist/default
./build.py --package org.test.touchtracer --name touchtracer \
--version 1.0 --dir ~/code/kivy/examples/demo/touchtracer debug installd

# --package: java name of your application
# --name: title of your application
# --version: version of your application
# --dir: location of your application containing the main.py

Then you’ll get a nicely bin/touchtracer-1.0-debug.apk

Pro:

  • A blacklist.txt file that can be used to exclude files in the final APK
  • Reusable distribution for other applications
  • Modular recipes architecture
  • Be able to build independents python distributions

Cons:

  • You need a main.py file that will be used for starting your application
  • Only one java bootstrap available, using OpenGL ES 2.0.
  • Only Kivy toolkit is working. I’m sure that other people can enhance it to add other toolkit recipes. But for example, pygame is not gonna to work because the android project is OpenGL ES 2.0: pygame drawing will not work.

I hope you’ll like it :)

We would like to thank Renpy / PGS4A for its initial pygame for android project